How to Stain Trim Already Installed [3 Effective Ways]
Installing trim in your house for decoration is a tremendous idea. Its various advantages made this decorative idea very demanding day by day. Not that it is only for decorating your home beautifully but also you can adopt this decoration concept to hide the gap between two empty places. Also, it helps if you need to contract or expand any space, then installing trim in those places is certainly a great idea.
But there are some issues you might have to face while installing trim and staining it after installing it might require extra methods to follow. For example, knowing how to stain trim already installed is a very important DIY project. Whereas installing trim in your house is a process that sometimes requires suggestions of some professionals, staining it might not require any. You can do it by yourself if you just find out the right process for the job.
As not many people think that installing trim is harder than staining it, the case might not be the same all the time. There are certain rules and regulations that you need to follow strictly to get the right result. Otherwise, there is a chance that you ruin all the nice decorative trims that are already installed in your house. Therefore, to save your installed trim from being damaged, follow this article thoroughly to insert the proper methods of staining it in your head.

Table of Contents:=>
- How to Stain Trim Already Installed – 6 Step Process:
- Step 1: Prepare the Surrounding of the Trim:
- Step 2: Clean the Trim and Sand It:
- Step 3: Remove the Extra Paint and Sand the Trim:
- Step 4: Fill the Gauges and Wipe the Trim:
- Step 5: Apply Primer and Stain the Trim:
- Step 6: Seal Your Stain:
- How to Restain Wood Trim Darker:
- Stripping and Refinishing Wood Trim:
- FAQs:
How to Stain Trim Already Installed – 6 Step Process:
An installed trim requires more attention while staining than an uninstalled trim. You legit need to take care of a lot of things if it is already installed. Otherwise, bringing about a perfect or close to perfect finishing is almost impossible. The whole task might seem a little bit daunting but once you know some basic knowledge about staining it, you can at least have a finishing close to the ultimate perfection.
We already know the fact that, trims can be of various material-based. Staining is the process that makes your trim look more beautiful and modifies the color combination with the entire house. Therefore, choosing the right color to apply following the right method is an immensely important task. Follow the steps that we are going to you with for the proper staining of your installed trim.
Step 1: Prepare the Surrounding of the Trim:
As your trim is already installed, before staining it you need to take care of the surrounding of the trim first. This decoration item can be surrounded by walls of concrete or a door of glasses, or there can be any delicate elements surrounding that trim. In this situation, if you start staining directly then a lot of unexpected accidents can occur. Therefore, proper steps should be taken. Remove or eliminate all the things that are portable or movable.
If there is no option for removing delicate elements, then use tape and wrap them with the tape so you don’t accidentally apply a stain on them. After removing the portable elements and taping the delicate pieces, you need to wrap walls of concrete too in order to save them from any bad effects of the later procedures.
Step 2: Clean the Trim and Sand It:

The next job is to clean the installed trim properly. After protecting the essentials surrounded by the trim, you can have some free-hand movement while cleaning the trim. And in this way, you will also face little obstacles in cleaning the trim and the cleaning process will be quick and fulfilled.
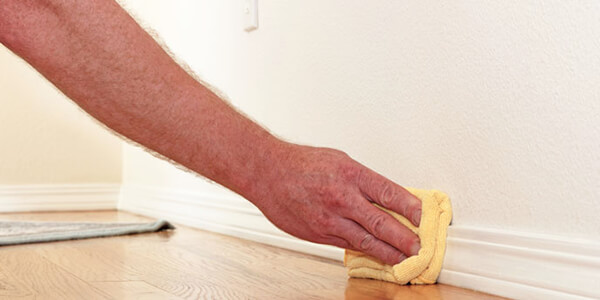
Now, to clean away dust from the trim, you can use a rag. Damp the rag into the soapy water and then wipe the dust away from the trim. If you have old paint on the trim and they are peeling off gradually, then you need to adopt different techniques after cleaning the dust out of it.
Step 3: Remove the Extra Paint and Sand the Trim:

Sanding is a very fine method to make the surface even smoother. It enhances the adhesion power of the surface as well. If you have new trim installed in the wall or door, or anywhere in the house, then sanding trim is rarely necessary. But sanding with extra fine grits of sandpaper is always the right thing to do. Bring 1000 to 3000 fine grits of sandpaper and then start sanding to make the surface smooth of the trim.
If there is old paint to remove then you need to bring about coarse grit of sandpaper. Sanding will remove the old paint to a great extent. However, do not worry about the little portion of the residue of the old paint because quality paint will cover the remainder of old paint with its pigmentation. Choose a sheet or detail sander to sand trim and baseboards, It is the fastest way to remove old paint from Trim and baseboards.
Step 4: Fill the Gauges and Wipe the Trim:

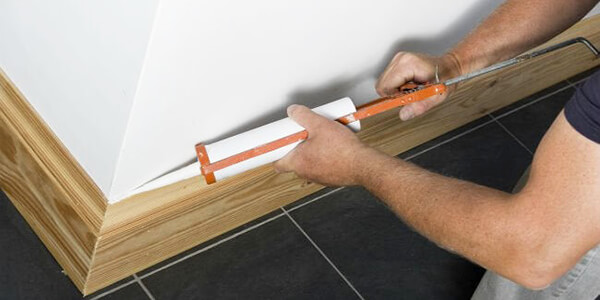
Now after sanding, you need to take a close look at the trim. If you see any gauges, dents, or crevices, you need to fill them using quality filler. You can also use caulks to fill the areas that have gaps and crevices. After using filler, you need to sand those places again. This will help to even those spaces where you used filler and now there are bumps in those spots.
After sanding, it is time to wipe out the extra dust from the trim. Use a damp cloth and wipe out the dust that happened because of sanding and filler. And let the trim dry for a moment.
Step 5: Apply Primer and Stain the Trim:

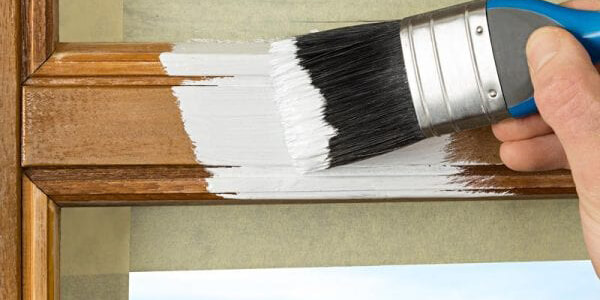
The next step is the primal step that you have to do with a lot of care. Use a brush and when you see your trim is all ready and dry, apply the primer to it. Bring a quality stain and wait till the primer dries. It will take not more the one or two hours to dry.
When the primer dries on the surface, it increases its adhesion power of it. Now staining will exist for a longer period and it will not be ruined or damaged any sooner now. So, apply the stain using a paintbrush or you can use spray paint for a quick application too. Spray stains come with great pigmentation and they don’t drip down to the wall or downward. That’s why it is more convenient to apply. You can apply two or three coats of paint to bring out the desired darkness of the color.
Step 6: Seal Your Stain:

After staining your trim, the job does not end here. You need to provide protection to the paint so it increases its longevity and you can get durable service. That’s why varnishing is the step that every professional DIY says to do. Apart from darkening the shade of color and bringing out the vivid color, it protects your stain from moisture and humidity too.
But before applying any quality exterior-rated varnish, you need to sand the stain. Also, you are not allowed to apply it until you wait a day or two after applying the stain on the trim. Then after one or two days, apply the varnish using a brush and let it make the stain look smoother, and it fives a very fine finishing to the whole task too.
How to Restain Wood Trim Darker:
Stains are really forgiving and therefore if you want to make your wooden piece a little darker, you can always do that by adding coats after coats. And if you want to lighten the color, then sanding or stripping is recommended. However, you might think that if it is alright to restain the wood trim darker. The answer to the question is very positive. You can easily restain your wood trim with a darker stain and this will suit your wood trim too.
In fact, the easier way to make your wood trim looks fresh, new, and gorgeous is when you stain over the old paint with a darker shade. However, to be accomplished in re-staining your wood trim darker, adopt the following process at once.
Step 1: Gather Essentials for the Job:
First thing first, you need some definite products to accomplish the job. Brace yourself because you will not need to provide much effort to gather the materials as they are some simple and easy-found essentials.
- A darker-shaded gel stain according to your preference
- Hand gloves
- A clean rag
- A lint-free rag or foam brush, or paintbrush
Step 2: Clean the Wood Trim:
You need to clean up the dust that the wood trim is carrying. You cannot just apply a gel stain right away on a surface without checking if needs cleaning or not. It is always better to wipe out the microscopic germs and dust from the surface before staining it with a damp rag. Otherwise, it cannot be detected by our bare eyes and you will face trouble regarding the adhesion ability of the surface.
Step 3: Stir the Stain:
As you want to re-stain your wood trim darker, bring a darker shade than the shade that is already on the wood trim. Then wear your hand gloves properly. They are important for your own safety. Then before opening up the container of stain, stir it very nicely. It will help the stain to restore its consistency which is one primal characteristic of a quality stain.
Step 4: Apply the Stain:
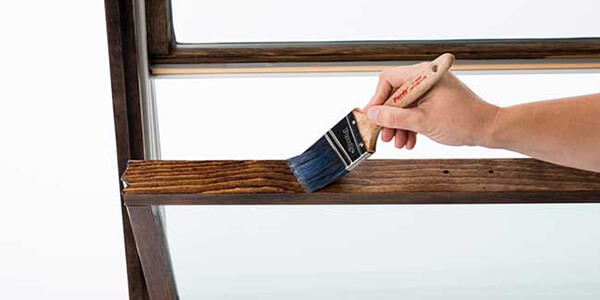
Now, it is time to apply a gel stain on your wood trim. You can use a lint-free cloth for this job of applying stain. However, a pain foam brush is more convenient so you can think of using it too. Dip the foam brush in the container of dark stain and then apply it to the wood trim. Go in the direction of the wood grain while staining. The first coat might still give a translucent color.
Step 5: Apply Second or Third Coat:
Because the first coat can hardly reach your desired color, you might have to apply a second coat and then a third coat. But before that, let the first coat dry properly then apply the second coat in the same manner as before. If it does not come up with the desired dark shade then prepare for the third coat.
But the third coat might darken your wood trim beyond your expectation level, so sand the trim before applying the third coat with fine-grit sandpaper. It will make the surface smooth and then lighten the color too so you can reach the desired dark shade by applying the third coat. So, apply the third coat in the same manner and thus you can meet your desired dark color on your wood trim.
Stripping and Refinishing Wood Trim:
Stripping and refinishing wood trim can be a long process. But the final look it provides is priceless. If your trim is still great in condition but you don’t like the color and it has dents, crevices, and scratches, then stripping the old paint and refinishing the wood trim is required. As it is kind of a long process and attention to detail is required, let’s get started with the process at once.
Step 1: Strip the Old Paint:
Scrapping is what old people suggest to strip old paint from wood trim. But there is a smart solution for this job and you can save up your energy by not scrapping old paint. Use Peel Away solution on your trim. It comes with paste on a paper. If you put it over the trim and let it rest for 24 hours straight, you will see the old paint coming off the wood trim.
Step 2: Clean the Trim:
Now you need to clean the trim with a great cleaning solution. Use a sponge or clean rag and scrub the surface of the trim properly. Denatured alcohol is good at cleaning stubborn dust from wood trim. Though it has abrasives, a little amount of it won’t affect your trim. After that, you need to roughen the surface in order to get a fine finishing. That’s why you need to use an abrasive synthetic finishing pad. This pad will roughen the space without removing the stain or creating any damage to the surface.
Step 3: Use Soft Wood Putty:
After roughening the surface a little bit, you need to take care of the nail holes, gauges, and crevices on the trim. Softwood putty works as a great filler. As there are various colors of wood putty available in the market, you need to choose the one that goes with the color of your trim. Fill the holes and dents with the filler and use your fingertips to wipe out the extra filler to make it plain to the surface of the wood trim.
Step 4: Apply Stain Properly:
Now you need to bring a stain that would match the color of the wood trim. After bringing the stain, apply it thoroughly to your wood trim. It will cover the scratches and uneven spots that happened by the filler at the same time. You can use a lint-free rag to apply the stain. Remember that, finding a matching stain is something very trickiest and when you find it, you give more than half the refinishing of the trim. Add a second or third coat in order to have the desired color and shade.
Step 5: Apply the Finishing:
Now to make your old wood trim look new again, do the last step by using polyurethane. This gives an amazing finishing to wooden trim. Use a rag and apply the polyurethane coat to the trim. Wipe-on polyurethane provides a shiny look to the surface. For more protection, you can give 2 or 3 coatings of polyurethane. For wood trims that are exposed to sunlight, use varnish over them for the final finishing. Thus, you can strip and refinish your wood trim and give them a new and fresh look again.
FAQs:
Question: Can you stain trim without sanding?
Answer: Staining direct on trim without sanding is applicable but the result might not be as smooth as it normally provides after sanding. Using fine grits of sandpaper allows the surface to have tremendous adhesion and smoothness. This adhesion determines the longevity of the stain as well which you will not get if you stain your trim without sanding it before.
Question: Can you stain over the existing finish?
Answer: Staining over the existing finish is possible. But to have a distinct result you need to use a darker shade of stain over the existing finish. Otherwise, you cannot have a vivid result if the existing finish is already in a light shade and you stain it with a light color again. That’s why if you choose to stain over the existing finish, choose a darker stain.
Question: Do you have to remove the trim to re-stain?
Answer: It is not necessary to remove the trim to restain it if you see the trim is still in good condition. If you see there are a lot of gauges, nail holes, unnecessary attack of molds, and an odd shape of the trim beyond restoration, then removing it might necessary. Apart from that, you can use wood filler and sandpaper to bring back the evenness of the trim and start re-staining it.
Last Updated on July 18, 2022 by Rogers Weber
[As an Amazon Associate I earn from qualifying purchases.]
![Sanding Nooks and Crannies [10 Effective Ways]](https://solvesonic.com/wp-content/themes/schema-lite/images/nothumb-related.png)

