How to Smooth Plaster Walls Before Painting [Fix Rough Uneven Walls]
Smoothing out a plaster wall is never being an easy task. It is a time-consuming task as well as tiresome too.
But the good news is that, with the right technique and tricks, a person can smoothen plaster walls before painting.
In this article, we will discuss different effective techniques of how to smooth plaster walls before painting.

Let’s learn together.
Table of Contents:=>
- 6 methods to Smooth Out Bumpy Plaster Walls Before Painting:
- Method 01: Skim Coating Applying
- Method-2: Use a New Drywall to Replace the Uneven Drywall
- Method-3: Using Another Material like Wood to Cover the Wall
- Method 4: Apply Crack Fillers to Fix Uneven Walls
- Method-5: Stay with it
- Method-6: Smooth Walls without Plastering by Sanding the Drywall
- Frequently Asked Questions:
6 methods to Smooth Out Bumpy Plaster Walls Before Painting:
Nobody likes bumpy walls, even if it is the exterior wall. Below are 6 methods to smooth out uneven walls.
Method 01: Skim Coating Applying

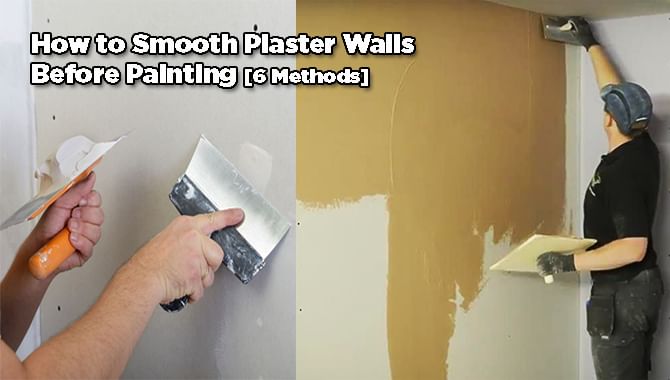
Skim coating is an excellent solution in smoothing a rough wall. This process is applying a thin coat of mud using a squeegee knife. The mud is also known as a joint compound in this process. Read Also: 7 Best Drywall Mud for Skim Coat
It is easy to follow and delivers outstanding results when doing crack repairing, joint filling, or levelling uneven areas.
Unfortunately, many of us don’t know how to apply a skim coat.
Let’s read the below steps intently.
Step 01: Surface preparing

Things You Will Need:
a) Drywall Sander: Check on Amazon=>
b) Joint Compound: Check on Amazon=>
c) Putty Knife: Check on Amazon=>
d) Wallbond Knife: Check on Amazon=>
e) Medium Grit Sandpaper: Check on Amazon=>
f) Drywall Mud Pan: Check on Amazon=>
g) Safety Goggles: Check on Amazon=>
h) Face Mask: Check on Amazon=>
Thoroughly clean the surface. Use degreaser, primer-sealer, and sand down with a hand sanding block if required. For faster ways to sand, you can sand with an orbital or a drywall sander.
Step 02: Mixing the joint-compound

Take a mud pan. Mix a little amount of water and mud. Proper mixing is necessary. If the mixture is less thickened, it will drip when applied. On the other hand, if it is too thick, you will face a problem to apply it to the wall.
Make the mixture in such a way so that the squeegee knife can hold it up easily.
Step 03: The Mud Application Process

Start applying the mud from one corner. Don’t hurry with the process. Also, don’t be too late that the coat gets dried before you finish the first coat.
Hold the squeegee knife at a 30° angle and continue applying the coat from top to bottom.
Tips: If you are applying the skim coat for the first time, it would be best to practice the process on a drywall piece.
Step 04: Application of the final coat

A single coat will not give you the expected result. So, the 2nd coat is necessary. However, if 3rd or 4th coat is necessary to get the required result, you can do it without hesitation.
Before applying the 2nd coat, let the 1st coat dry. And this time, apply the coat horizontally.
After finishing give at least 2 – 3 hours to dry.
Once dry, run your bare hand over the surface to check imperfections. Sand down if needed.
Clean the whole area once the process is done.
Isn’t the process easy to follow? This is the most effective solution for smoothing an uneven plaster wall before painting.
Method-2: Use a New Drywall to Replace the Uneven Drywall
According to BECHTEL (USA’s top construction site), this method will not cost you more compared to skim coating. You can follow this process if you have less time on your hand to finish the uneven wall smoothing project.
If the imperfections of the surface are highly visible and present at every corner, replacing the uneven drywall with new drywall is the best method.
Method-3: Using Another Material like Wood to Cover the Wall

One of the professionals of BECHTEL explained that both homeowners and companies are now preferring wood panelling. They are using beautiful wood for the wall. Even some industrial companies are installing corrugated metal on the wall surface. It gives a cool view of the interior.
At the same time, it also has an issue. Before installing the new surface, you have to fix the baseboard problem if you have any.
Another solution is: after removing the baseboard, take some wood stock and put it into the lowermost of the wall, and again fix the baseboard with new paneling.
Method 4: Apply Crack Fillers to Fix Uneven Walls

Fillers like Polyfilla are a good option to smooth out the uneven wall by small cracks and craters.
From the name itself, you have understood that the filler’s functionality is to fill up the wall plaster cracks and holes so that you can apply paint on the wall smoothly.
Now you might be thinking about what fillers to be used.
Generally, water-soluble fillers deliver the best result. They are readily available in tubes in different paint stores.
It is advisable not to use too much when using fillers to fill up cracks and holes or other imperfections. Always start with a small amount so that you can easily remove the imperfections from the wall. Otherwise, a new issue will arise.
Characteristically, fillers shrink a little bit after drying. So, before sanding the surface with sandpaper, it is best to leave a small lip of filler from the different cracks and crannies you have filled. Also, use fillers twice when filling deep holes since fillers shrink after drying.
Method-5: Stay with it
Yes, you can stay with the imperfections of the walls. You can trick playing with the paint type and lightings of the room.
- Paint a few pieces of artwork. These will distract the eyes from the uneven surfaces.
- Use low lights, and don’t focus them on the wall.
- Don’t apply bright, glossy, or flat paint. These will highlight the imperfections.
This method is pretty effective when you decide to live with an uneven wall.
Method-6: Smooth Walls without Plastering by Sanding the Drywall

Depending on the nature of unevenness, you have to use a sander. Hand Sanding Block sanders are good enough to smooth slightly uneven walls. While for rough spots and imperfections, you can use an electric sander. But electric orbital sander or drywall sanders are hard to use since it is powerful and can do damage to the wall. Also, a lot of preparation is necessary when handling an electric hand sander.
Frequently Asked Questions:
Question: Can electric sander sand walls?
Yes, for sanding drywall, you can use a drywall sander, orbital sander and hand wall sander to make smooth the surface of the drywall to prepare to paint.
Question: Is it dangerous to sand plaster?
Answer: Sanding plaster walls create a lot of dust. This way, a person can lead to occupational asthma. It is recommended to use a respirator when sanding plaster.
Question: Is sanding plaster walls mandatory before painting?
Answer: The truth is, imperfections in the plaster walls are unavoidable. Light sanding is enough for light imperfections, while heavy sanding will help you when the imperfections are rough.
Question: Can I put wallpaper on an uneven wall?
Answer: Yes, you can. But putting wallpaper on an uneven wall is not a good idea.
Bottom Line
Everyone wants to have a smooth wall before painting because elegant painting results depend a lot on the wall’s smoothness.
Before trying any of the above methods, first practice with a small wall area to get yourself familiar with the process. With the right tricks and tips, you can successfully deal with an uneven wall.
While painting, consider the feel and look of your wall and pick the right paint. Let us know which method you used to Smooth Plaster Walls before Painting your interior or exterior wall. Reference: https://en.wikipedia.org/wiki/Joint_compound
Last Updated on August 27, 2021 by Rogers Weber
[As an Amazon Associate I earn from qualifying purchases.]


