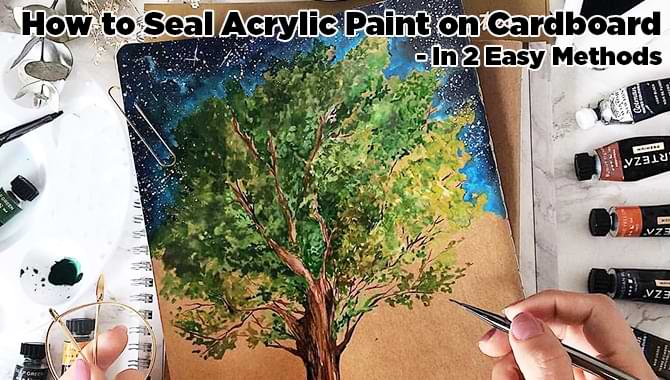
How to Seal Acrylic Paint on Cardboard – 2 Easy Ways
Even though acrylic paint is mostly water-based, it’s a blessing for the cardboard because the paint suits it pretty well. You can paint a nice landscape painting or any other painting on your cardboard by using acrylic paint and you might want to save it from fading, dust, or UV ray. Therefore, a strong sealing after the finished painting is required.
Because all your hard work with acrylic paint will go in vain if you don’t seal it properly. To get a popping and long-lasting result of the painting, you need to adopt the tricks of how to seal acrylic paint on cardboard. Because that’s the way you can protect your favorite finished painting for years.
So, to wrap your cardboard with beautiful and long-lasting paintings, check out our solutions of sealing at once.
Table of Contents:=>
Why do You Need to Seal Cardboard for Painting?
Sealing acrylic paint enriches the beauty of the painting and lets it pop magnificently. Besides, the process puts life into the painting and pulls out the depth of the painting to a great extent. If you think you are done with your painting on cardboard and it turns out to be beautiful, then seal it using the sealing materials to get the best possible long-lasting result.
Before you know what materials and how you need to seal your acrylic painting, we should inform you that, sealing is not mandatory, as acrylic paint is naturally durable and provides the best performance. You can always keep your painting open and unsealing.
Besides, sealing requires an extra penny and you might simply want to avoid the trouble and keep your painting simple.
But in case you want the painting to last years after years and want it to pop throughout the time, then sealing is recommended for you.
How to Choose the Right Type of Varnishes for Cardboard:
To seal an acrylic painting on cardboard, you need to know about varnishes first. A fine result comes out if you seal the acrylic paint with varnishes. You’ll get to know that there are two kinds of varnishes available in the painting store – spray-on varnish and brush-on varnish. Besides that, you need to choose which varnish you would like to put on your painting from below.
1. Brush-On Varnish:
Brush-on varnishes come in different types to provide different finishing to the acrylic paint. Some provide glossy sealing and others provide matt or satin sealing. However, it depends on you how you want the finishing of the acrylic paint to look like.
a) Acrylic Polymer Varnish: Acrylic polymer varnishes are favorable for the job of sealing acrylic paint on cardboard. They are not toxic like other varnishes and come with easy instructions. For glossy transparent sealing, you can rely on acrylic polymer varnishes.
Because, the varnishes mix with water without complaining, it doesn’t require much to do. The brush that you use to varnish can also be washed with clean water and soap. Its non-toxic formula provides an extra hassle-free advantage to seal the acrylic paint.
b) Acrylic Resin Varnish: If you want a stronger effect of glossiness and boldness, acrylic resin varnishes are the best recommendations for you. Though acrylic polymer varnish requires less trouble, acrylic resin varnishes are a little high maintenance. Its high-gloss effect can be got if you maintain the don’ts of the varnish.
It requires mineral spirits to wash the brushes. As acrylic resin varnishes carry toxic chemicals in them, an open ventilated space is required to varnish the painting. The airflow reduces the toxicity of the varnish and prevents you to inhale it. Read Also: 8 Best Paint for Basement Stairs 2021 [Reviews & Buying Guide]
c) Glossy, Matte, and Satin Varnish: Glossy varnishes are appealing and enhance the beauty of acrylic paint to a great extent. If you intend to sell your painting, choose the glossy varnish to get the top-notch shiny effect on it. However, matter and satin varnishes also provide favorable sealing.
The colors might pop less when you choose satin or matte varnishes. These varnishes provide a semi-gloss effect on acrylic paint. If you want a light effect of the dark color in your painting, the matte varnish is required. And for a clearer finish, the satin varnish is required while sealing acrylic paint.
Besides, you can mix the three varnishes altogether. This will provide a different kind of effect on your painting. Also, by maintaining a measurement ratio chart, you can add the three varnishes and get your desired effect.
2. Spray-On Varnish:
Spray varnishes are the easiest way to seal acrylic paint on cardboard. It has few requirements and takes less time than brush-on varnishes. Besides, it provides an even coat. However, spray varnishes throw toxic fumes. Also, using a spray-on varnish creates a space messy.
2 Easy Methods to Seal Acrylic Paint on Cardboard:
1. Preserving Acrylic Paint on Cardboard with Brush-On Varnish:
There are some procedures you need to follow to preserve acrylic paint with brush-on varnish on cardboard. Your duty is not just to brush varnish properly, you need to take proper care and have patience during the whole process. Let’s check out the right ways to protect acrylic paint on cardboard step by step.
Step 1: Gather All the Materials:
First thing first, you need some preparation before you start the job of sealing acrylic paint. These preparations require some important materials. These materials need to be gathered and put together to process a hassle-free job. Check out the list of the material below:
- A clean medium-sized jar or cup
- Choose varnishes according to your demand
- An isolation coat
- Synthetic bristled brush
- Clean water and mineral spirit
- A solid even surface (wooden surface)
- Paper towel
- A dry space (you can use your garage to do the job or an open space where a good amount of airflow is available)
Step 2: Check Out the Painting If It’s Dry:

After you gathered all the materials that will help to seal the paint, check out the painting on the cardboard is completely dry or not. Keep in mind that, the varnish will not work or rather ruin the whole paint if the painting is even slightly wet.
It would be wise if you take the attempt of varnishing after 3 or 4 weeks of the painting. By that time, the painting will be dry fully. But if you live in damp weather, give more time to dry the painting. A wet painting gets mixed with varnish and leaves streaks on it which is not what you want, right?
Step 3: Prepare Your Varnish Seeing the Label on the Bottle:
To prepare the varnish, you need to be specific about it. You will get a clear idea if you just check the instructions that are labeled on the bottle. If you use mineral spirit varnish which is acrylic resin varnish, don’t think of mixing water in it.
For polymer varnish, you are allowed to mix water in it. Take a clean jar for mixing. To understand the ratio, check the label on the bottle again. Make sure you are preparing enough of the mixture to complete the whole painting. You can save the extra varnish for later. But it might get cloudy if you save it for more than 3 or 4 days.
Step 4: Apply an Isolation Coat:
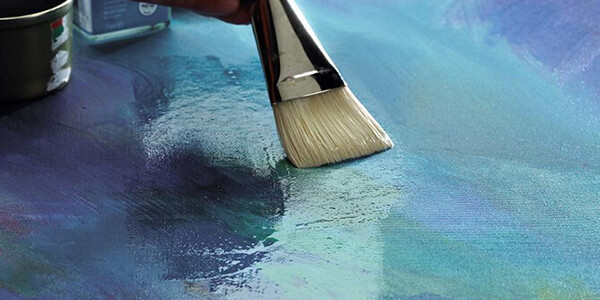
An isolation coat before varnishing is important in case you want impermanent varnishing. Besides, there are a lot of benefits of the isolation coat. This coat creates a vivid barrier between the painting and the varnish. To avoid the cloudy effect of varnishing, an isolation coat is applied.
Besides, because of this coat, you can change the varnish later and can fix the painting as per your choice. You can put another varnish afterward if you want. To apply an isolation coat, choose a gel gloss or gel medium. Take 2 parts of it and 1 part of water and blend them properly. For vivid idea, check out the instruction that is written on the body of the gel gloss.
After you make the perfect blend adopting the perfect ratio of water and gel medium, apply it to the acrylic painting. To apply the coat correctly, take a clean brush and dip it into the mixing of the isolation coat. Apply the coat evenly with the brush on the painting vertically at first.
Let the coat dry for 24 hours and apply another coat horizontally this time and let it dry for another 24 hours.
Step 5: Lay the Painting Flat on a Surface:
After the isolation coat is dry, you need to lay your painting flat on a solid surface. A solid wooden surface will reduce the runs and drips of the varnish and save the surface from permanent damage as well.
Besides, it’s easy to remove the drops of varnish from a wooden surface. Choose a dry and ventilated space to do the varnishing job. Make sure the place is undisturbed by children, pets, and unwanted guests.
Step 6: Apply the Varnish:
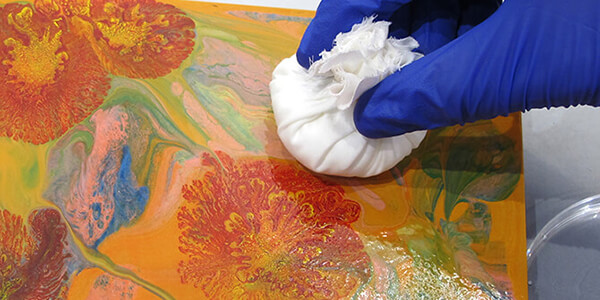
Dipping the 1/3 portion of the brush in the varnish, put it out of the jar. Then brush the painting carefully. Make sure, the strokes of the brush are going in one direction evenly following the parallel way. Brush the whole painting in the same manner from one side to the other. No space should be left undone.
Step 7: Let It Dry and Apply the Varnish Second Time:
Let the first application of varnish dry for few hours. Apply the varnish a second time on the acrylic painting. This time the strokes of the brush should be conducted in the opposite direction from before. To understand it better, you can simply apply the varnish vertically for the first time.
And while it is dry, apply the varnish horizontally for the second time. The second time of the varnishing will cover all the undone space of the acrylic paint. Wait for 3 or 4 hours and the second application will be dry by the time. And that’s how you seal the acrylic paint on cardboard with brush-on varnishes.
A third application is unnecessary if the two times of varnishing cover the painting already. Read Also: 7 Best Clear Coat Over Latex Paint 2021 [Reviews & Buying Guide]
2. How to Protect Acrylic Paint with Spray-On Varnish:
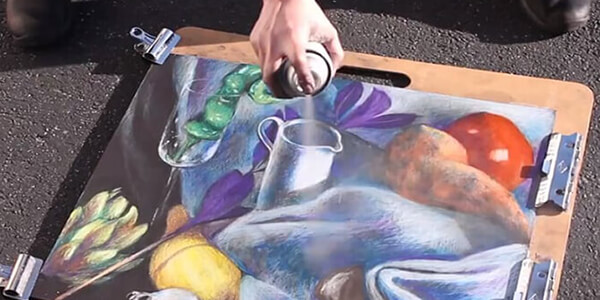
As we’ve told before that, the spray-on varnish is the easiest yet the messiest way to protect acrylic paint on the cardboard you can still adopt the process to save some time and energy. Do the following steps to avoid messes and get a successful result.
Step 1: Get an Open Ventilated Space:
You better do the spray-on varnish in an open place where there is much airflow. This helps the heavy fumes of the spray-on varnish mitigating in the air instantly. For safety precaution, wear a mask to keep yourself safe from the toxic fumes and bad odor of it.
Step 2: Put a Sheet on the Ground:
Put a large old sheet on the ground to keep it safe from the spray varnishing. The sheet must be larger than the cardboard painting. And the lay the painting flat on that sheet properly.
Step 3: Spray the Varnish:
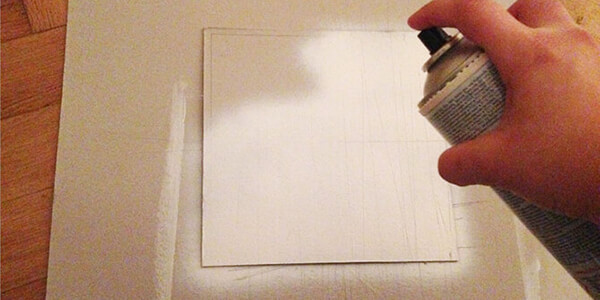
After that, spray the varnish holding the can. Make a back and forth motion while spraying it. Make sure the first application is covering the full cardboard. Spray the painting vertically at first.
Step 4: Let It Dry and Spray the Second Time:
After the first spray, let it dry for few hours. For the second time, spray the varnish on the acrylic paint of cardboard horizontally to make an even surface. Don’t overdo it for it leaves an uneven surface that looks unprofessional. Let the application dry to seal the acrylic paint on the cardboard properly.
No need to spray the varnish for the third or fourth time if it seems fine with the two applications of the varnish.
Tip: If you want a picture of your acrylic painting on the cardboard, then capture it before sealing it with varnish. The glossy varnishing represents a glare when you put a flashlight on it. Therefore, this might seem elusive to many viewers.
FAQs:
Question: Is it appropriate to varnish acrylic paint on cardboard?
Answer: Paints always enhance the beauty of anything. And for cardboards, they are very useful for painting material. Once you put the acrylic paint on it following the long-lasting procedure, your cardboard will be needing sealing for the best result.
Sealing the acrylic paint on cardboard with varnishes is the appropriate way to seal it. Make sure, you are adopting the necessary materials to get a glossy and vivid painting on your cardboard.
Last Updated on June 8, 2021 by Rogers Weber
[As an Amazon Associate I earn from qualifying purchases.]