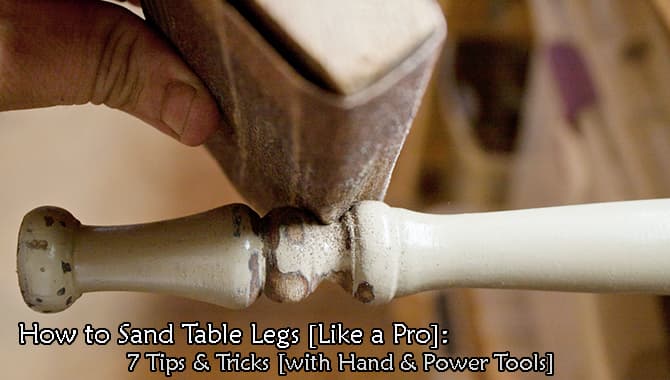
How to Sand Table Legs – In 7 Effective Ways [Like a Pro]

The most challenging sanding task is to sand the chair or table legs. It is easy to sand when the surface is flat. But the table legs are not usually flat. Thus, you cannot sand the table legs easily because of its round and irregular shape.

Sanding table legs often seems like a difficult job.  Though the process of sanding table legs is a bit difficult it is not impossible. If you use some modified techniques and tricks then you will be able to sand them easily. Well, follow this article to know how to sand table legs.
How to Sand Table Legs

Table legs are difficult to sand because of its grooves. You cannot sand them like a flat surface. But, don’t worry. You can still sand it perfectly. Make sure that you have some chemical strippers and paintbrush and then follow the under mentioned process.

Gather Your Supplies Before You Start –

Good preparation makes the job easy. Get all your tools ready in one place. This saves you time later. You will not have to stop and find things. A clean, organized workspace is key.

You will need a few basic items. These include safety gear, sandpaper, and cleaning tools. Having the right tools for the job is vital, which it makes the process smoother and get the results better.

Your Essential Toolkit: Best Tools to Sand Table Legs –

  • Sandpaper (Assorted Grits): You need 80-grit, 120-grit, 180-grit, and 220-grit.
  • Sanding Block: This holds sandpaper flat. It is great for square legs.
  • Sanding Sponges: These are flexible. They are perfect for curves.
  • Detail Sander (Mouse): This is an optional power tool. It helps in tight corners. Many consider it the best sander for table legs with sharp angles.
  • Safety Goggles: Always protect your eyes from dust.
  • Dust Mask (N95): Do not breathe in wood dust. It is bad for your lungs.
  • Gloves: These protect your hands from splinters.
  • Tack Cloth: This special cloth picks up fine dust.
  • Clean Rags: You need these for wiping the legs.
  • Mineral Spirits: This helps clean the wood. It also reveals missed scratches.
  • Drop Cloth: This protects your floor from dust and spills.

Sandpaper Grits: Best Sandpaper for Wood Table Legs –

Sandpaper is your main tool. It comes in different “grits.” The grit number tells you how coarse it is. A low number means it is very coarse. A high number means it is very fine. You must use grits in the correct order. You cannot skip grits. If you do, you will leave deep scratches.

Coarse Grits (60 to 80)

This is heavy-duty sandpaper. You use 80-grit to remove material fast. It is for stripping thick paint. It also removes deep gouges. You must be very careful with this grit. It can change the shape of the wood. Only use it when you have to.

Medium Grits (100 to 150)

This is the workhorse grit. You will use 120-grit or 150-grit the most. This grit smooths the wood. It removes the scratches left by the 80-grit. It is good for general-purpose sanding and starts to make the wood feel smooth.

Fine Grits (180 to 220)

This is your finishing grit. You use 180-grit or 220-grit for the final pass. This step prepares the wood for stain or paint. It leaves a very smooth, polished feel. Your hand should glide over the surface. Do not skip this final sanding step.

7 Ways to Sand Table Legs Spindle Perfectly [Smooth Finish]:

Well, you cannot sand grooves with a regular sander. If you want to sand groove then you have to follow the steps that you already know by now. There are also some tricks that might make groove sanding easier for you. Take a look.

1. Use Rubber Contour –

You can use rubber contour sanding for sanding grooves. These tools are very handy and you can use them both for concave or convex surfaces. These are kinds of rubber pads. The rubber contour sander has many different sizes.

You can choose the one that you need. This tool is amazing for sanding grooves. Moreover, They prevent radius distortion and hand fatigue. It is very is to sand grooves with rubber contour sander. Just that the pad that fitted in the groove area and keep sanding.

Contour Sanding Grip for sanding grooves
Hand Sanding Easy with Contour Sanding Grip=>

2. Use Radiator Hose –

You can use a radiator hose for curvy places and grooves. It is also very easy to make.

First, grab a radiator hose and search for the horizontal part. After that, take a hacksaw and chop it off. Then clean it properly. Now, take a piece of sandpaper and stick it with adhesive. Your radiator hose is ready! Now you can sand the grooves easily with the help if this.

Use Radiator Hose wit sandpaper

3. Modify Your Sandpaper –

You can modify your sandpaper a little by using duct tape to sand grooves of the table legs easily. There are some places that cannot be reached easily. For this, you can make a combo of sandpaper and duct tape. This is a very easy trick also.

You just have to attach some duct tape behind the sandpaper. After attaching, cut them in smaller stripes. Well, it is ready to use now. Use it to sand narrow places that are hard to reach.

modify sandpaper with duct tape

Read Also: 6 Best 1×30 belt-sander [helps to sand wood & Metal Furniture]

4. Using Power Tools [More Faster Method]:

There are many sanding tools available on the market. You can use power tools to decrease the time of sanding. Moreover, Power sanders can be used in a large area as well as tight spots. It’s a faster method of sanding than using hand sanding tools. Take a look!

a) Dremel Tools

Dremel tools are the best for sanding tight spaces as various shapes and types of sanding accessories can be attached to the tool head. It can have three types of heads such as oscillating head, rotating head, and saw-like head. Also, they can have custom heads. This tool reaches almost every tight places that are hard to reach. No other power sanding tool is as effective as Dremel tools to sand in tight places.

sanding tight spaces as various shapes dremel tool
Sanding with a Rotary Tool [Dremel]=>
Dremel tools play an important role in sanding table legs. There are many tight spaces in table legs that cannot be sanded through the normal sander. That is why a Dremel tool is needed because you can attach any suitable head for sanding chair legs to the tool.

b) File Sander [Mini Belt Sander]

File sander (also known as mini belt sander) is one of the best sanding tools to sand hard to reach areas. Usually, it is used for accurately detailed sanding. You can reach a tight spot through its narrow belt. This small sanding tool is very amazing as you can also do powerful sanding with the belt sander.

As we know there are many tight places in the table leg that’s why file sander is also helpful for sanding legs. You can use its narrow belt to go to tight places and get accurate detail work.

sand hard to reach areas with mini belt sander
Mini Belt Sander is Useful for Spindle Table Legs Sanding=>

c) Detail Sander

The detail sander is usually used for sanding the corners. It has a triangular sanding pad. There are many similarities between the orbital sander and detail sander. But detail sander is better when it comes to sanding tight corners.

Detail sander can be used in sanding table legs. You can get the corners done by using this tool.

detail sander uses
Detail Sanding Dining Table’s Leg=>

5. Hand Sanding Tools & Tips

There are plenty of products in the market that can help you to sand the grooves easily. If you are able to buy products from the market then you can buy sanding disc or emery boards.

a) Emory Board

The Emory board is very narrow. Thus, it can reach the grooves easily. But the problem is the emery board takes too much time. If you try to do it fast you might ruin the design.

sanding hand tool Emory board

b) Sanding Disc

The sanding disc is better for this as it doesn’t take much time and gives you the desired finish. You can use a 3M roloc sanding disc. But do it slowly for better results. Don’t’ know what is the sanding Disc or block read here.

hand sanding with Sanding Disc
hand sanding made faster with Sanding Disc=>

6. Tricks to Sand Round Table Legs:

It is easy to sand a flat surface. But when it comes to a round surface it is not that easy. Well, the reason for this is the size of the sanding paper. Most of the sandpaper or sanding pads are flat. That’s why it is easy to sand a flat surface.

Must Read: How to Sand Curved Surfaces – 3 Easy & Faster Ways

Though sanding round surfaces such as table legs are difficult if you change the techniques a little bit then it will be easier than you can imagine.

First, take a knife and sandpaper. Cut the sandpaper carefully into stripes. Then move the strip back and forth to shape the round table legs or any other round object. If the sandpaper tears then get a new one or use some duct tape to the back of the previous one to make it work again.

duct tape with sandpaper modified tricks

Read Also: How to Sand Plywood to Get a Smooth Finish

7. Sanding with Liquid Sander Deglosser & Sandpaper:

1. First, grab a paintbrush and apply a layer of coating of chemical stripper to the legs of the table. You can find chemical strippers at any home improvement store. Also, you can buy it online. Make sure that you buy the right one as the application process might vary. Follow the instructions on the package.

2. The chemical stripper that you applied has to set on the legs of the table. If you don’t give time then it will not set on the legs. Thus, it is important to give it the exact time that has been written on the instruction. Usually, 20 minutes is enough to set it on.

3. Now, take some water or mineral spirits. Then, dispel the chemical stripper by using these. If you get confused about water and mineral spirits take a look at the instructions. It will let you know which one is better to use. After removing the chemical stripper let table legs dry for 1 day or 24 hours.

4. Take a 120 grit sandpaper and sand away the remnants from the stripper. You will find some areas that are hard to reach. In that case, you can use a brass toothbrush. The brass toothbrush can be used for the grooves also.

5. Now, take a 220 grit sandpaper and sand the legs of the table again. The reason for sanding them again is to make them smoother. Don’t sand much. Try to sand lightly and do not give much pressure.

Techniques for Different Leg Shapes –

Table legs are not all the same. A square leg needs a different method than a curved leg. Here is how to handle each type.

How to Sand Flat or Square Legs:

These are the easiest legs to sand. The key here is to keep the edges sharp. You do not want to round them over. Use a sanding block. Wrap your sandpaper around it. The block gives you a flat, firm surface. This helps you sand evenly. It also protects your fingers. Sand with the grain. Move in long, straight lines.

An electric “mouse” or detail sander works well here. It has a triangular head. This shape gets into corners perfectly. Use a light touch. Do not let the sander stay in one spot.

How to Sand Turned Legs and Curved Wood Surfaces:

Turned legs have round spindles and curves. They are very common on traditional tables. This technique also answers how to sand curved wood surfaces in general. A sanding block will not work here. The best tool is your hand. Your hand can feel and follow the curves. A flexible sanding sponge is also excellent.

The sponge bends to match the shape of the leg. For the round spindles, use the “shoeshine” method. Cut a long, thin strip of sandpaper. Hold it like a shoeshine rag. Wrap it around the spindle. Pull one end, then the other. This sands the curve evenly.

How to Sand Cabriole Legs:

Cabriole legs have elegant S-curves. They are common on antique furniture. These legs have both rounded and flat-ish areas. A combination of tools is best. Use a flexible sanding sponge. This is your most valuable tool for cabriole legs. The sponge will follow the complex curves.

For the “knee” and “ankle” of the leg, be gentle. It is easy to sand too much here. Let the sponge do the work. For the flatter parts of the curve, you can support the sandpaper with your fingers.

Common Sanding Mistakes to Avoid –

Even with a guide, mistakes can happen. Here are the most common ones. Knowing them helps you avoid them.

1: Sanding Against the Grain

This is the biggest mistake. Sanding against the grain tears the wood fibers. It leaves deep, ugly scratches. You may not see them at first. But they will scream at you. The stain will collect in the scratches. It will look terrible.

Solution: Always check the grain direction. Always sand parallel to it.

2: Skipping Grits

It is tempting to skip a grit. You want to save time. You go from 80-grit straight to 220-grit. This is a bad idea. The 220-grit paper cannot remove the deep scratches left by the 80-grit. It just polishes the “peaks” of the scratches. Your wood will look smooth. But the scratches are still there. You will see them under the finish.

Solution: Follow the process. Use each grit in order. 80, then 120, then 180, then 220.

3: Pressing Too Hard

Sanding is not about strength. Pushing harder does not make it faster. It just creates deeper scratches and can lead to an uneven surface. If you’re wondering how to sand uneven table legs that are already warped, that requires identifying high spots and removing them, which is a different skill. For finishing, pressing too hard is the main cause of creating unevenness.

Solution: Let the sandpaper do the work. Use light, even pressure. The abrasive particles are sharp. They will cut the wood.

4: Not Cleaning Between Grits

Dust is your enemy. If you leave 80-grit dust on the leg, what happens? That coarse dust gets trapped. It will get under your 120-grit paper. It will create new, deep 80-grit scratches.

Solution: Clean thoroughly between every single grit. Vacuum. Wipe. Use a tack cloth. A clean surface is mandatory.

5: Ruining Edges and Details

This often happens with power sanders. It is easy to stay in one spot too long. The sander eats away the wood. You lose a sharp edge. You flatten a beautiful carving.

Solution: Be very careful with power tools. Keep them moving. For details and edges, always sand by hand. You have much more control.

How to Know When You Are Done –

How do you know when the sanding is perfect? This is how to smooth out wood table legs for a perfect, glassy feel. You use two senses. You use touch and sight.

The Touch Test:

Close your eyes. Run your hand lightly over the wood. Your fingertips are very sensitive. You will feel any rough spots. You will feel small scratches. The wood should feel like satin. If you feel anything rough, sand that spot again.

The Light Test:

This test reveals hidden scratches. Take a bright light. Hold it at a low angle to the wood. This is called “raking light.” The light will catch the edge of any scratch. It will cast a tiny shadow. Mark any scratches you see with a pencil. Gently sand them out. Then wipe the wood and check again.

Why Proper Sanding Is So Important?

Sanding is the foundation of a great finish, especially for refinishing wooden table legs. You cannot skip this step. A smooth surface is essential. If you’re sanding furniture legs for painting, paint will not stick well to rough wood. Stain will look blotchy and uneven. Good sanding creates the perfect canvas.

Proper sanding does two main things. First, it removes imperfections. It takes away old paint, varnish, or scratches. Second, it opens the wood grain. This allows the new finish to soak in deeply. This makes your finish more durable. It also makes it look much better. Taking your time on sanding pays off.

Final Words:

Sanding table legs is a process. It is not a race. It takes time and patience. But it is not difficult. It is just a series of simple steps. It is the most crucial step in how to refinish old wooden table legs.

The sanding table might look easy but after you start doing it you will realize that it is not that easy as you will face many problems. But if you follow some process and trick it will be a lot easier. You already know what the process and tricks are.

counter grip chair leg moving tips
Sanding Turned Table Legs: Made Faster & Easy

You now have the effective way and know how to prepare. Now, you can easily sand table as you know how to sand table legs which is the difficult part. If you have any question then you are always welcome to ask it. We will try to answer you. Also, if you find this article beneficial let us know in the comment box.

Last Updated on November 10, 2025 by Rogers Weber

[As an Amazon Associate I earn from qualifying purchases.]

Add a Comment

Your email address will not be published. Required fields are marked *