Sand Door Frame Before Painting: Effective Ways & Full Process
Doors are of no use if the door frames do not come with a perfect finish. When you want to close your room door, it will ultimately stick to the door frame. But this thing might become annoying if the frame is not well-sanded and polished. You might also need to put some muscle power when you are about to open the door. These problems are signs that the door frame is unfit and improper. That is why you need to know about the sand door frame before painting for its proper fitting.
Since you are already on this site, we are presuming that you want to know how to sand door frame before painting. So, let us cover everything on this topic so that you can get hassle-free closing and opening features of your door.
Only a little bit of sanding can bring a smooth door frame clearing all the high points. Sanding the door frame is not a hard task at all. In fact, most probably, it is the quickest job on earth. You will know when you read the entire article.

Table of Contents:=>
What Kind of Sander Do I Need to Sand a Door & Door Frame?
To sand a door and door frame it is necessary to grab the proper sander first. Without a proper sander, you might not get the desired result. However, there are basically three types of sanders available in the market. You can choose any one sander to sand a door frame and door. The types are given below.
a) Disc Sander

Presuming by the name, this sander comes with sandpaper that has a circular feature and is whirled at higher speeds. Disc sanders are considered one of the best for prepping door and door frame surfaces before painting. For covering larger areas smoothly and quickly, disc sanders are undoubtedly the best option. However, you might need some practice before going to the main object since the machine is highly powerful.
b) Sheet or Orbital Sander
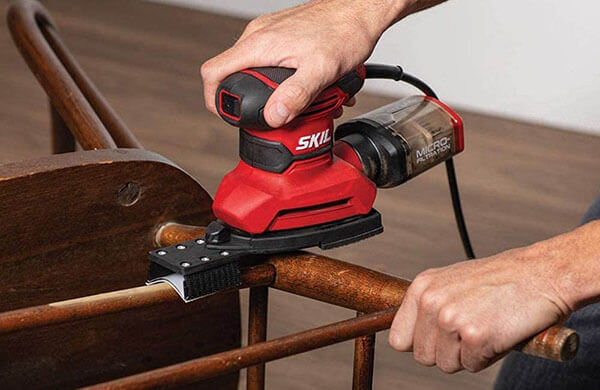
 Another kind of sander considered great for sanding door and door frames is orbital or sheet sander. This sander is also known as pad sander, quarter-sheet sander, circular sander, and all. Generally, this is a handy sander yet offers versatile uses. Also, it is smaller than the disc sander. So, if you think you do not have larger areas to cover, you can make your sanding job done with this sander.
Again, for covering shaping corners and tight spaces, a sheet sander is a proper compact tool. The best tool for Sanding trim and Baseboards is also a sheet sander.
c) Detail or Finish Sander
 This sander is also known as triangle sander or mouse sander. It is also a sheet finishing sander. If your door frame or door consists of softwood in it then this sander is the best option. This machine comes with a small edge that allows to sand and shapes even the corners of a tight place. nonetheless, compared to previously mentioned sanders, this sander operates a bit slow. Yet, for covering congested softwood surface areas use a detail or finish sander.
However, you can also use sandpaper on a flat sanding block for sanding the door and door frame. Flat sanding blocks deliver an even pressure while sanding. Nonetheless, if you are using a sanding block then make sure that it comes with the right grit. The proper gritted sandpaper or sand block can make the process of sanding the door and door frame quite smooth and quick.
How to Sand Door Frame Before Painting:
We have already mentioned, sanding a door frame is quite an easy process once you have the proper tools. Especially, when it comes to sandpaper or power sander. Within only a few hours, you can make the job done. However, before getting to the whole process step by step, let’s see the needed materials.
Required Materials
- Dust Sheet
- Duster
- Sponge
- Sandpaper
- Sugar soap
- White spirit
Now that you know about every material, make sure you do it right when you get to know the procedure as well.
Prepping the Door Frame for Sanding
This is the very first thing to do before you start sanding the door frame. For the prepping purpose, you need to remove the door from the frame first. Remove the strike plate and hinges too so that nothing happens to the door while dealing with the door frame.
Step – 1: Protect the Places Around Door Frame

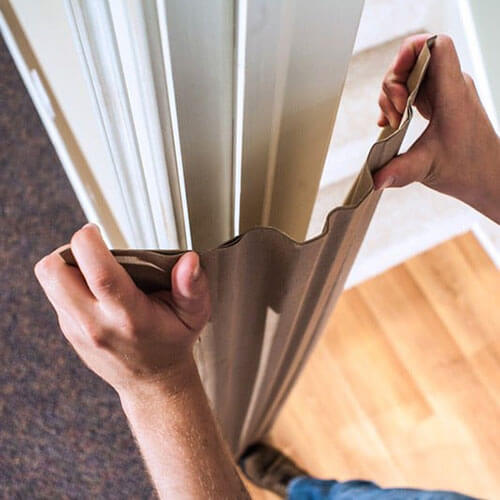
Protecting around the frame area is a crucial thing to do. For this purpose, you can use masking tape to cover the areas. The decorator’s tapes are also useful in this regard. After removing the door so that you can get full access to the frame make sure you cover the door with a dust sheet.
Step – 2: Dust Your Door Frame

After covering the areas, it is time to dust the frame. Make sure you do not leave any place while dusting. From all latch spaces to every crevice, get into everywhere and keep dusting. If you leave any dust in any corner of the door frame, it will ruin the whole finish. Thus, you will not get the exact result that you want. Moreover, discovering a
Step – 3: Remove Dirt with Sugar Soap

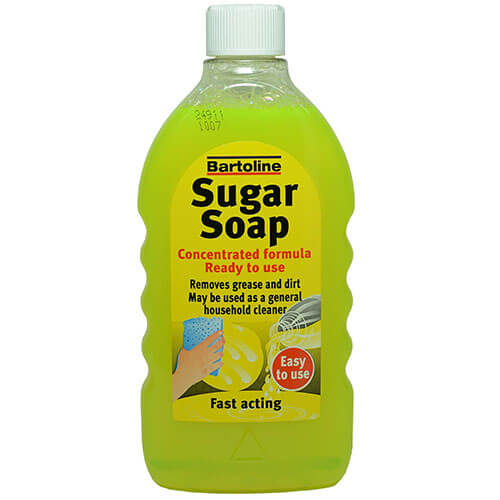
For removing the build-up dirt on the door frame use sugar soap. Using sugar soap is the best way to wash away the frame. It will remove all dirt along with grease from the frame surface. Grease is produced when the door frames are located in kitchens or bathrooms. You need to clean up this airborne invisible grease especially when you are sanding old door frames. It takes place on any surface available. However, you can also use mild detergent instead of sugar soap.
Step – 4: Dry the Door Frame
Once you finished washing up the door frames with sugar soap, you need to dry them as well. You surely do not want a paint coating over a moisture surface. So, dry the door frame thoroughly.
The process of Sanding the Door Frame:
After cleaning up the door frame and getting rid of the old grease, it is time to finally start sanding. Let’s get to the steps.
Step – 1: Choose Proper Sander or Sandpaper
Since it is important to go for the right sander, make sure you decide which one is the best suited. To be done with the sanding task quickly, it is always suggested to use a disc sander. Nevertheless, for smaller door frames you can go for the best sheet sander or finish sander.
Now, if you decide to go with sandpapers then look for the right grits and buy accordingly. For your information, first of all, you need coarser or medium-grade sandpaper, to begin with. To deal with larger imperfections, coarser sandpaper is helpful. It also helps in going through the finer grains by buffing out all scratches. This process eventually makes the surface smooth.
Step – 2: Start with Medium Grade Sandpaper
If the door frame is previously painted, then to remove the paint you will need medium-grade sandpaper. Sandpaper with 80 to 120-grit will be ideal for this task. Keep sanding until the paint is finally gone and the deep and small scratches are about to leave. Also, at this point of sanding, you will see all the high points are gone and the door gets closed and opened easily in the door frame. However, if you think the frame is comparatively smooth then you can simply go with 100-grit sandpaper.
Step – 3: Sand with Fine-Grade Sandpaper
After sanding the door frame with medium-grade sandpaper, later you need to sand it with a fine-grade one. Using fine-grade sandpaper is important to remove the scratches that are left while using medium-grit sandpaper. So, use 150 to 180-grit sandpaper in this step.
Step – 4: Try with Very Fine-Grade
At this stage, after sanding the frame with medium-grit and fine-grit sandpaper respectively, it is time to sand with very fine-grade sandpaper. Try with 220 to 240-grit sandpaper. Go slow and sand slightly. It will leave a smooth finish on the door frame.
Step – 5: Wipe away the Frame
When the sanding is done and you reach a smooth finish of your door frame, wipe away all the dust. Make sure there is no dust left before you start painting. So, clean the frame with the help of a tack cloth. Again, you can use a lint-free cloth for this purpose. Dip the cloth into the white spirit and apply it over the frame. Afterward, let the frame dry thoroughly.
Well, now, the door frame is smooth and ready to be painted.
What are the consequences of not sanding the door frame before painting?
You must need a smooth base before you go paint on any surface. Otherwise, the painting will not last long for sure. We know it might be quite fascinating and brings you a lot of satisfaction when rolling away from the paint over any surface yet prepping the surface is the most important thing to do.
You just cannot randomly run the roller over a chipping and dirty surface with a lot of high points. The paint will not stick to the surface properly if you are actually going to do it. Whereas to want the painting to last longer, sticking the paint to the surface is very much necessary. And it is possible only when you manage to prepare a smooth base of the given object be it the door or door frame.
Only by obtaining the slightest amount of sanding you can make wipe away all the dirt, blemishes, and high points. Also, it helps in removing damaged spots as well. Thus, to ensure a strong hold-up surface so that the paint coat sticks to the smooth surface offering longer durability, and the door frame. This is the easiest formula to sand door frame before painting
FAQ
Should I sand the door frame before painting?
Only a clean and smooth door frame is suitable for the paint to stick properly to the surface. It is also important for having a better finish. without sanding the paint will not stick let alone flake. But only a light amount of sanding can bring a huge change. A smooth surface is a key to the proper adhesion of the paint. whereas, sanding the door frame is key to a smooth surface. So, sanding the door frame before painting is indeed a wise idea.
What is the fastest way to sand a door?
The fastest and best way to sand a door is to use a power sander. Since we already mentioned about three types of sanders that are disc sander, sheet sander and finish sander, disc sander serves the best purpose here. Disc sander can cover a large surface of a door within a very few minutes delivering a perfect finish for painting.
Nonetheless, you can also use a non-clogging sanding sponge or sandpaper. Before buying look into the label if it is indicating stearated or non-clogging. Use sandpaper with 180-grit or 220-grit over the door surface slightly.
Sand the surface until you get a smooth vibe then just vacuum the dust. Lastly, wipe away the surface using a damp cloth. Then let the door dry naturally and there you have done possibly the fastest job on earth.
How do you sand a door to fit a frame?
Sanding a door to fit its frame requires some techniques. You can use a belt sander for this very purpose to make sure after the task, the door actually fits the frame. Settle the belt sander on the door side horizontally and then turn it on. Now, keeping the belt sander on the door side in a flat way, start sanding back and forth.
When the side of the door is sanded properly, go for the next line by following the previous line. This way sand the whole door maintaining the line. When you are done, inspect and check out if the door fits its frame or not.
What grit sandpaper for interior doors?
If the interior doors are already painted, start with medium-grade sandpaper of 80 or 120-grit. It helps in removing deep scratches. Gradually, go with fine and very fine-grade sandpaper until you get a smooth surface that will hold up the paint pretty well.
However, most of the time the interior doors are relatively smooth. In this case, sanding with 100-grit sandpaper will give you the desired result.
How do you sand and repaint a door frame?
The sanding door frame is quite easy just follow the process we have discussed above. Now to talk about repainting a door frame, first choose the right paint. mostly semi-gloss or gloss paints are used for this purpose. Also, many people want to go with matt paint but it does not look satisfying when it gets dirt on it. Also, matte paint finish catches fingerprints and this is annoying at the same time.
So, when you select your desired paint, start painting without leaving brush marks. It is trouble for amateur painters out there. So, you can use a paint roller instead. Paint rollers are arguably the best tools for painting purposes. They can also reach each cranny and nooks properly and cover them with paint.
Last Updated on July 18, 2022 by Rogers Weber
[As an Amazon Associate I earn from qualifying purchases.]


