How to Sand Between Coats of Stain – When it is Necessary
To sand between coats of stain is not a must for all kinds of wood. Some types of stain can make the wood grain to rise. So, you’ll need to do some light sanding between coats of stain. Also, sanding between coats of deck stain or wood stain is required to level out the excess stain on some portion.
Our main focus of this article is to know different wood stain types and the necessity of sanding each type. We’ll also try to whether it’s a good idea to sand all types of stain or just some selective ones.

Table of Contents:=>
Should you Sand Between Coats of Stain?
For a better finish and perfect bonding between two layers of stain, the answer is yes. This is not mandatory for oil-based stain. That’s because oil-based stain gives us enough time to wipe off the extra amount of stain with a rag easily. Also, for polyurethane stain, you can use very light sandpaper. For example, you can use 320 or 400 grit sandpaper and sand very carefully.
But you must sand between coats of water-based stain. It’s because water-based stain raises the wood grain, which doesn’t look good until you sand it. You can begin with 80 grit sandpapers and move towards finer sandpapers. After sanding a coat of stain, you will see the blotchy finish, but it will go away after another coat on top of it.
How to Sand Wood After One Coat of Stain?
For all types of stain, the question must come in front of you, Should you sand between coats of wood stain? The answer is yes, you can do some light sanding between coats of stain for a better finish, but it is not necessary. Let’s see the steps about how you can do it.
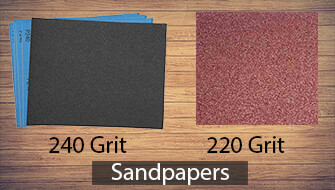
- The first recommendation is to use 220 grit or 240 grit sandpaper. You can do much sanding as it can affect the layer of the stain.

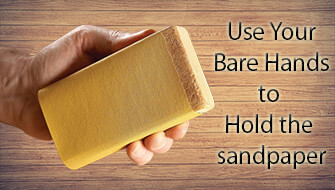
- You can use a sanding tool or use your bare hands to hold the sandpaper and do very light sanding carefully.

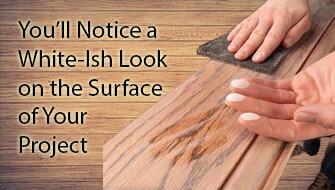
- Now, you’ll notice a white-ish look on the surface of your project. But it’ll be gone once you’ve put another layer of stain.

Doing this light sanding will make the surface bond with good adhesion with the succeeding coating. Using steel wool to sand between the coats is strictly prohibited. Finally, you can apply your preferred topcoat as the stain isn’t a protector for the wood surface. Read Also => Top 6 Best Outdoor Concrete Stain 2021 Reviews.
Tips for Successful Sanding:
Patience is Key: Rushing the drying process or skipping the sanding step can lead to a less-than-desirable finish. Allow each coat to dry completely before sanding and applying the next.
Inspect Your Work: After sanding, inspect the surface closely to ensure you’ve achieved the desired smoothness. Sand any remaining imperfections as needed before applying the next coat.
Maintain Consistency: Keep your sanding strokes consistent and follow the wood grain. This will help you achieve an even surface without creating noticeable sanding marks.
Use Quality Materials: Invest in high-quality stain, sandpaper, and applicators for the best results. Cheap materials can lead to uneven finishes and frustration.
Protect Yourself: Always wear a dust mask and safety glasses when sanding to protect your respiratory system and eyes from dust particles.
Different Types of Stains:
In the beginning, we thought that should you sand between coats of some types of stain? Yes, you should stand between the coats if you want good bonding between the coats of stain and a better finish. For some type of stain, sanding is the right thing to do where it’s prohibited for some types. But sanding before applying a stain is a good practice. So, we’re going to know which stain needs sanding on the preparation stage, which one needs sanding in between coats, and if the stain needs sanding at all.
1. Oil Stain
Our first type and the most commonly used stain is the oil-based stain. Sanding on the preparation stage can help apply the oil-based stain. It is important to make sure that the wood surface is clean of any dust or debris. Also, make sure that the surface is smoothened out by sanding.
After applying the stain, you won’t need to sand between coats of oil-based stain. Just use a paintbrush or a rag to lay a thin layer of the stain and let it dry. For a darker look, you can do multiple layers of stain and sand lightly in between the coats, which are not a must.
2. Water-Based Stain
For sanding between coats of Minwax stain which is water-based, you should use a 180 grit sandpaper. The water-based stain can raise the grain, and you can do light sanding for a better finish.
To sand between coats of water-based stain, you’ll need to use more fine sandpaper. We can suggest 600 grit sandpapers. It’s good to do sanding in between for this case as you’ll get a better finish and look.
3. Gel Stain
Gel stain also needs sanding the project surface before applying. So, you can use light sanding for the preparation stage. Now, bring the 80 grit sandpaper and start sanding slowly. Some would recommend steel wool, but we prefer sanding more.
After that, keep using sanding paper with different grit numbers until you get to 180 or 220 grit sandpaper. Now, you must be thinking,do I need to sand between coats of gel stain? No, you only need to wipe off the excess stain with a rag.
4. Lacquer Stain
Lacquer Stain doesn’t need sanding between coats. It’s because it has the property to melt below another layer of lacquer coating. So, you won’t have to think about good adhesion.
But you can do some very light sanding if you see finishing defects on the surface. Use a 320 grit sandpaper to make the defects smoothened out and keeps the surface as clear as possible before another layer of lacquer stain.
5. Polyurethane Stain
Polyurethane stain can be water-based or oil-based. For both types, you won’t need any sanding between coats. Because those stains dry quickly enough and let you wipe off the excess stain.
But you can do some sanding with very fine sandpapers. We would suggest you go for the 320 grit papers and move up to 400 grit sandpapers. You’ll see a blotchy finish of the stain after sanding. So, ask yourself if you’re okay with that or not and act accordingly.

Final words:
There’s nothing much left to say about the topic. You can sand between coats of stain if you are a perfectionist, and we appreciate it. But never use lower grit sandpapers and wait for a few minutes after applying the stain. And make sure that there’s no dust on the surface left after sanding. Hence, you’ll be good for staining, and your project will have a more natural look.
Last Updated on September 7, 2023 by Rogers Weber
[As an Amazon Associate I earn from qualifying purchases.]


i just applied my 3rd coat of Minwax stain and left it on for 12 minutes
this morning when I ran my fingers across the stain (dresser) It felt a little gritty and uneven
can i lightly sand it before I put on the top coat to smooth it out without ruining the finish?
yes, you can lightly sand it before applying the top coat.
I applied the first coat on the floors of house yesterday, but I got tired and I could finish the job yesterday. It has been more than 14 hours now. Can I apply the second coat without sanding? I used an oil based one.
to get a piece of shiny furniture, sand lightly in between the coats is beneficial for oil-based stain, which is not a must.
There’s certainly a great deal to know about this topic. I like all of the points you’ve made.|
I have some curly maple that I am trying to get a specific look from. I want to have red highlights in the deeper grain. I applied a oil based stain (Sedona red on 1 side, gunstock on the other) and let it dry overnight. Using 220 I sanded until the red was left in the deeper undulations. I came back to the piece an hour or so later it looks as if the stain is rising to the surface. Did I miss a step? Should I let it dry longer?