Saltillo Tile Cleaning and Sealing – [Ways, Tips & Tricks]
For having the best rustic appearance and being the most authentic and natural product, Saltillo tile has been used for ages. This popular tile lasts long without even requiring frequent cleaning. Generally, Saltillo tile comes in different colors including red, terra-cotta, yellow, orange, and all. People mainly install this tile for both exterior and interior flooring purposes.
However, to make it last longer, cleaning and re-sealing the tile after every 2 to 4 years are important. Also, since tile installation comes with different processes, cleaning the surface should be the first thing to do. Only after that you can seal the tiles or apply an acrylic coating finish of multiple layers.
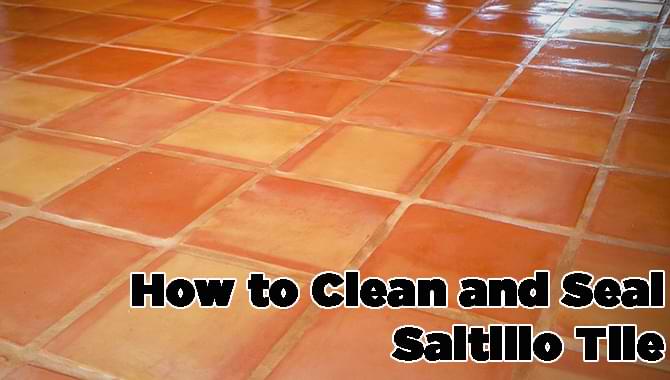
Again, for your information, to produce Saltillo tiles excavated clay is used from the earth. This clay is processed into a tile and then they are dried and fired finally in kilns. So, to protect the installed tile, cleaning and sealing them is important. Luckily, today our topic is Saltillo tile cleaning and sealing. So, to know in detail, stick to us till the last.
Table of Contents:=>
Ways to Clean and Seal Saltillo Tile:
Well, cleaning and sealing Saltillo tile might seem like a professional job to you. It is partially correct since the task is a bit complicated. But once you know the process, it can be a DIY project. Especially, when you will have the accurate equipment and required stuff, the process will be way easier.
Cleaning of Saltillo Tile (2 Ways):
We have already mentioned, that Saltillo tiles are made of clay. The material is highly soft and porous. That is why cleaning the tile is a bit difficult. Moreover, while making the tiles, topical sealers are used on them. This makes it more difficult to clean the tile. However, the cleaning of Saltillo tile mostly depends on the sealer used on it. According to the sealer’s endurability, cleaning of Saltillo tile should be done.
Hence, before you get to start with the cleaning, identify first if the Saltillo tile is sealed with a topical sealer or not. Nonetheless, there is a trick to determine topical sealers. If the grout lines around the tiles show a glossy and clear sealer then surely topical sealer is used. Also, if you see water beads on the surface of the tiles then it is also because of the topical sealer that has been used there.
However, cleaning Saltillo tile with topical sealer requires a different type of process. whereas other times you can clean the tile with alkaline, topical sealer needs to be stiped off first for cleaning.
a) Using Alkaline Cleaner:
The alkaline cleaner is the first pick to clean Saltillo tile. The cleaner is very useful if you use it properly. let’s get to the steps on how to clean Saltillo tile with an alkaline cleaner.
1. Mix the Cleaner with Water:
To clean the tile, you have to make a solution with an alkaline cleaner. Mix the cleaner with some warm water. The amount of alkaline cleaner should be less than the amount of water.
2. Apply the Solution on Saltillo Tile:
After making the solution, apply it directly to the tile flooring. Make sure you cover each place with the solution. After applying, let the solution dry on the floor. Let it be set on the Saltillo tile flooring for about fifteen minutes. Within this time, the alkaline will react on the tile floor and gradually loosen the grime up that took place on the tile by these years.
3. Scrub Off the Grime:
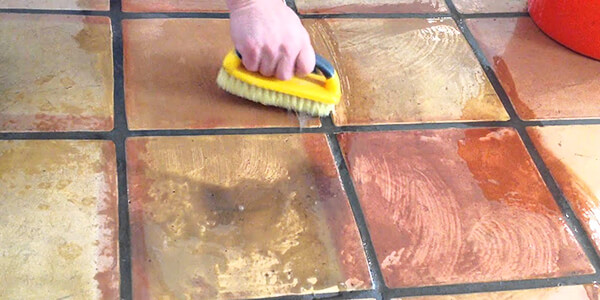
While the grime becomes loose, use a scrubber or brush to clean off the broken grime. Scrub softly over the entire floor. pressing hard while scrubbing might destroy the tile. Also, use a soft brush so that it won’t leave any scratches or marks when cleaning is done.
4. Pour More Solution:
This is an optional step. Nonetheless, to clean the Saltillo tile properly, you can add more solutions to the floor. But make sure, you pour the solution again when you left the previous solution to dry for 15 minutes. You can also scrub the floor simultaneously while pouring more alkane cleaner and water solution.
5. Rinse off the Saltillo Tile Floor:
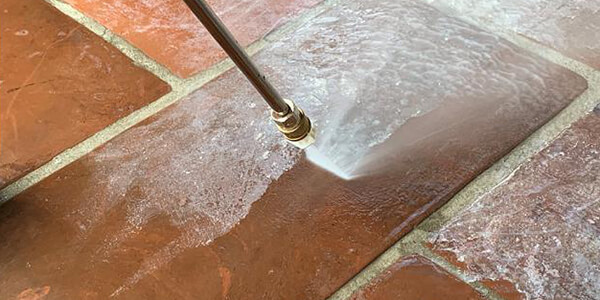
When you are done cleaning off all grime, it is time to rinse the floor. Rinse the entire Saltillo tile floor with water. Make sure there is no alkaline solution left on the floor. since the solution is going to soap up a lot, rinsing the floor properly is important.
In this case, using warm or hot water will give the best result. To wipe away the water, you can use a regular mop or a dry rag.
Tips:
- Let not the alkaline cleaner dry on the Saltillo tile completely. It will destroy the tile surface.
- You can use a little amount of acidic cleaner if you still see the grout lines. Apply a little amount of the acidic cleaner and let it fizz. Reacting with the grout, it will clean off the Saltillo tile.
- Use only soft brushes or pads for scrubbing purposes. Also, scrub gently when the cleaner is diluted to the floor.
So, these are the tips you should consider while cleaning Saltillo tile.
b) Stripping Topical Sealer:
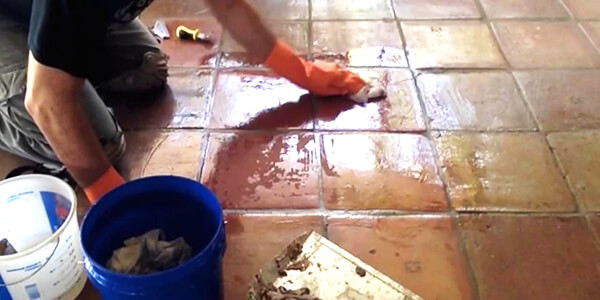
If the Saltillo tile floor is already sealed, cleaning the floor means you are cleaning the topical sealer itself. So, if you just want to clean the floor superficially, you can follow the previous way with just an alkaline cleaner. Softening up the sealer, it will clean off the attached grime. Consequently, you will get a new-looking Saltillo tile floor with a re-hardened sealer.
Nonetheless, this trick is not always helpful enough. Even with acidic cleaner, it will help you just a bit. Therefore, stripping the topical sealer is required in this case. It is a chemical method that does not involve any abrasion or sanding.
This can be a successful process once you remove the old sealer even from the grout joints of the Saltillo tiles. Moreover, the process is done with the help of the knees and hands. Strips are surely non-flammable and also non-toxic. They also do not leave any residue after use.
Required materials:
- Stripper
- Handheld brush
- Soft bristle brush
- Clean cloths
Process:
There are many commercial strippers available in the market for this purpose. You can get any of them that will offer a great service. The best strippers will provide a strong and highly effective result. Do the initial stripping process with the strippers.
After the initial stripping, strip the Saltillo tile with grout again with a new stripper. This time try to use the stripper that has higher evaporation capability. It will ensure no old sealer residue on the tile. It will even clean off the tile pores as well.
Also, by removing all the old sealers properly, it will achieve new properties so that the new sealer can be added smoothly. The new sealer will bond with the Saltillo tile properly after you strip off the old topical sealer from it.
Sealing of Saltillo Tile (Step by Step Guide):
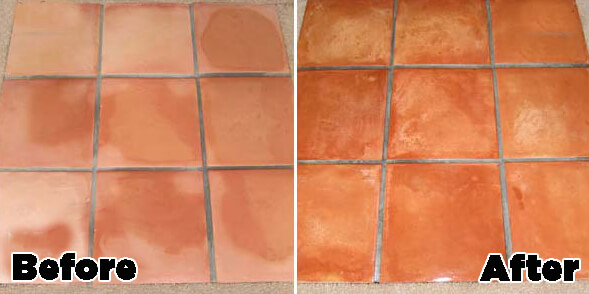
To protect any kind of tile, it is important to seal them. Since Saltillo tile is highly porous and handmade, sealing it will resist the absorption of liquid by the clay. Otherwise, it can cause harm to the tile. Also, cleaning off the tile becomes harder if it is not sealed. Moreover, sealant offers strength to the tile and keeps it from any kind of dirt and rock scratches.
Choose the Sealant First:
For sealing Saltillo tile, a breathing-type sealant should be the first pick. These types of sealants do not trap efflorescence or moisture within the tile pores. Once moisture is trapped inside the tile, it will loosen the installation and brush away each tile from the floor surface.
Hence, there are different types of sealants available according to your requirements. Some are here: 7 Best Sealer for Saltillo Tile (2023 Reviews)
1) Penetrating Sealer:
The penetrating sealer is mostly used for retaining the original color and natural appearance of any tile including Saltillo tile. The penetrating sealer is also known as the subsurface sealer. However, this sealer is specialized for Mexican pavers like Saltillo tile. For outdoor flooring, a penetrating sealer is the best one. Providing a rustic look to the floor, this sealer protects the originality of the tile.
It also resists deep stains on the tile surface. This sealer, however, does not appear as a coating. It keeps the tile exposed to wear and soil. Moreover, penetrating or subsurface sealers are low-maintenance.
2) Enhancing Sealer:
Enhancing sealers are mainly meant for highlighting the Saltillo tiles. They highlight the distinctive colors and characteristics of the tiles. Providing a semi-wet look, this sealer also does not leave a coat on the tile surface. Like any other natural sealers out there, enhancing sealers are also easy to apply. Their properties and procedures both are also the same.
3) Surface Sealer or Coating:
This sealer is also meant to highlight the distinctive characteristics of Saltillo tile. It produces a semi-gloss or glossy color as well. For indoor use, this coating is the best solution so far. This surface sealer is highly effective and functional when applied on the indoor tile surface. It keeps the tile protected from moisture and stain.
The best surface sealer will not become cloudy or white eventually, since it manages to resist the moisture to get into the tile anyhow. However, applying this sealer requires a skilled hand. Also, the surface sealer is comparatively high maintenance.
How to Seal Saltillo Tile – Step by Step:
Sealing Saltillo tile is not that tough task, once you know actually how to do it. Hence, for your convenience, we are elaborating it step by step.
To seal any tiles, the first and foremost thing is to clean them. Nothing is exceptional with Saltillo tiles. Cleaning away the dust and debris from the tile surface is important. Otherwise, sealing won’t be perfect. Rather you might find a deep stain on the tile surface. To clean the tile floor, you can initially use a broom and vacuum. Sweep lightly with the broom and then vacuum it.
Now to clean off the floor finally, swipe it with some hot or warm water. Then let the tiles dry before you start working on them again.
Step – 2: Stain the Saltillo Tiles:
Saltillo tiles require staining on the surface before having a seal on them. Staining the tile will result in a more vibrant appearance after finishing the sealing process. You can choose any color according to your desire for this purpose.
To apply stain on the tile surface, using a grout sponge will be wiser. However, you need to be a bit technical while staining Saltillo tiles. Stain about six square feet tile at a time. Continue this way until you are done with the entire floor. After applying the first coat, let it be set for about one hour. Then stain again and make a second coat.
Step – 3: Again, Clean the Saltillo Tile:
After staining the Saltillo tile, let it be set for about one day. The stain should dry completely. If the stain coating is not set completely, cleaning won’t be easier. Nonetheless, when it finally sets, run the vacuum cleaner over the tile surface. Then to clean more properly, rub a sponge with warm water over the Saltillo tile floor.
However, be careful with the fact that the tile does not get saturated while cleaning with water. Now, again, let the tile dry properly.
Step – 4: Seal the Saltillo Tile with Sealant:
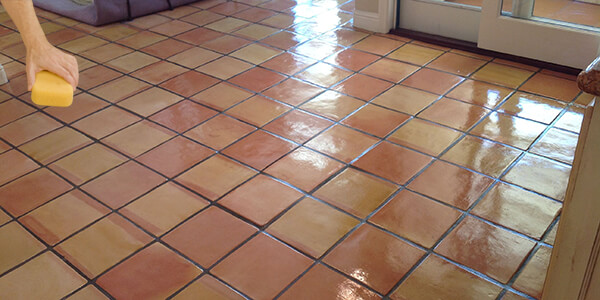
Pick any sealant as per choice to apply it on the Saltillo tiles. It is all up to you if you want a glossy finish or matte finish. To apply the selected sealant, use a grout sponge. Grab some sealant with a grout sponge and apply it to 6-ft.sq area at a time. Continue doing the process until you seal the entire area.
After applying the first coat, let it be set for one hour. When the first coat sets, apply the sealant again for the second coat. You can go for a third coat as well if you feel the necessity.
Step – 5: Grout the Saltillo Tiles:
Now, for the better protection of the tiles, grouting them is important. Penetrating grouts are highly recommended in this case. To apply grout, using a grout float will be helpful. It will fill the gaps between the Saltillo tiles. Grab some grout on the float and glide it between the gaps and fill them.
Step – 6: Let the Grout Dry:
After applying the grout, let it dry. It will take barely one day to dry fully. When it dries and sets properly, wipe away the extra grout.
Step – 7: Apply More Sealant:
To have the perfect finish of your Saltillo tile flooring, apply three more coats of sealants when the grout dries. Apply the coatings after washing the debris again. These last two or three coats of sealant will ensure the protectivity of the tile bringing a perfect finish.
FAQs:
Question: Can Saltillo tile be steam cleaned?
Answer: It will be an absolutely unwise thing if you think about steam cleaning your Saltillo tile. Since the tile is made of clay, it is highly porous. Hence, water will only bring damage to them. Ruining the sealer, steam mopping will ultimately destroy the Saltillo tile turning it hazy and white.
Question: How do you remove Saltillo tile stains?
Answer: You can remove stains from your Saltillo tile using a homemade cleaning solution. Mix three cups of water and one cup of ammonia in a spray bottle and shake it. Make a proper mixture and spray it over the stains. Leave it to set for about five to seven minutes and then scrub off the area. Soon the stain will come off.
Question: How do you deep clean terracotta floors?
Answer: You can deeply clean terracotta floors by using stone floor cleaners. Get one of the cleaners and mix 25% of the solution in a bucket full of warm water. Stir it and apply it over the entire floor with the help of a sponge or mop. Leave the solution for about 15 minutes and then start scrubbing. Make sure to scrub gently over the entire floor. When scrubbing is done, wash away the floor with water.
Question: how to clean Saltillo tile with vinegar?
Answer: Cleaning Saltillo tile with vinegar is a natural and effective method. To clean Saltillo tile with vinegar, you’ll need to mix equal parts of white vinegar and water in a bucket. This dilution ensures that the vinegar’s acidity won’t harm the tile’s surface. Begin by sweeping or vacuuming the tile to remove loose dirt and debris.
Next, use a mop or a soft cloth soaked in the vinegar and water solution to clean the tile. Gently scrubbing any stubborn stains or grime with a soft-bristle brush can help.
After cleaning, rinse the tile surface thoroughly with clean water to remove any vinegar residue, which could leave a lingering smell.
Finally, use a clean, dry mop or cloth to ensure the Saltillo tile is thoroughly dried. This method offers a natural and eco-friendly way to maintain the beauty of your Saltillo tile without the use of harsh chemicals.
Question: Should Saltillo tile be sealed?
Answer: Sealed Saltillo tile will serve you for ages. On the other hand, unsealed Saltillo tile is prone to surface wear. For being highly porous, unsealed Saltillo tile cannot resist moisture. As a result, the tiles get damaged very soon. Also, unsealed tile requires regular maintenance. So, to have a durable, long-lasting, and beautiful finish, seal your Saltillo tile. To make it last longer, cleaning the tile every 2 to 4 years is important.
Last Updated on September 24, 2023 by Rogers Weber
[As an Amazon Associate I earn from qualifying purchases.]


Hi Rodgers, we have a beautiful, but old, Saltillo tile floor throughout the house. It’s about 25 years old but still looks beautiful. The sealer has held up well but there are some deep stains in the grout. I’d like to clean the grout as well as possible and then reseal the entire floor, tile and grout. Must the entire floor be stripped, or is there a way to just do the grout and then reseal over the existing sealer?
Hello good fellow! As per your question, i have a personal view and would like to answer according to that. You don’t need to strip while cleaning the grout. Just use the mixture of baking soda, hydrogen peroxide and some drop of water and then apply the solution to the grout and it will be clean eventually. Then you can reseal.