Paint Wood Trim White or Replace [Advantages & Full Guide]
It is obvious that if you move into an old house, you will find its baseboards, windows, and other places have orangish wood trim. They do not look new anymore. Rather you feel the urge to replace the wood trims.
Again, many think of painting all of the trim white. Do people actually become confused about their old wood trim windows? Do you paint wood trim white or replace all of it?

Well, from our knowledge painting wood trim white is way better than replacing all of it. It is true that painting wood trim might cost a bit and it also requires a proper process with several prep jobs. But replacing the trim would cost way more. Also, you might need expert help in this regard while you can paint wood trim white. The process does not require professional help as well.
Moreover, white wood trim can change the entire look of the interior of your home. It makes the interior look neat and clean and more importantly, larger. However, painting wood trim white would not always bring the best result if the home walls are also painted white. In such cases, you can go for other paint options.
Table of Contents:=>
Advantages of Painting Wood Trim White:
There are certain reasons that you should consider painting the wood trim white. Even though the paint covers the natural beauty of the wood yet it is a great help to cover the orangish hue that the trim develops over time. So, let’s get to know what are the advantages you are likely to have if you paint the wood trim white.
a) Enlarges the Size:
Painting the wood trim white around the doorways and windows is a great trick to make the room look enhanced. Moreover, white wood trim makes the ceilings of your rooms look taller than before. So, if you think your room looks way small, paint its wood trim white so that the room looks spacious. Therefore, painting wood trim white creates an illusional space in your room helping you to decorate it nicely.
b) Easy to Clean:
Wood trim with white paint also looks cleaner than ever. The color white already indicates the significance of purity. It is also a declaration of hygiene. So, white paint color basically provides the feeling of sanitation and tidiness. Because you can detect dirt easily on white paint, it is also easier to clean. You can simply wipe away the grime and dirt from the trim with soapy water. So, good hygiene is also confirmed.
c) Creates Positivity:
Since white indicates peacefulness and calmness, painting the wood-trim white will also give you a vibe. While offering a contemporary and modern look, white trim also adds serenity to your feeling. It also uplifts the surrounding positivity through a bright consistency. So, a productive environment is already created for study rooms or family rooms.
What Kind of Paint to Choose for Wood Trim?
Now that you have decided to paint the wood trim white instead of replacing it, know what kind of white paint you should choose. There are certain factors to ensure before you choose the paint. The factors are given below.
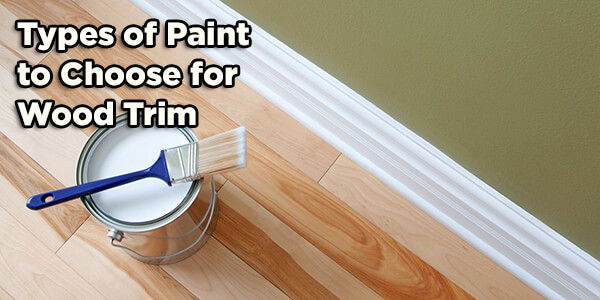
a) Sheen Selection:
It is a very important factor to decide while you are up to buy trim paint. selecting the right sheen of white paint is a bit challenging. However, shiny paint ensures long-lasting service and it is also easily wipeable. However, to paint the wood trim of doors and windows semigloss sheen of white paint is a good option. It will certainly offer a classic look. Also, you can go for satin white paint. This sheen tends to offer more of a matte texture. Nonetheless, satin paint is also durable and fairly wipeable as well. Read Also: 7 Best Metallic Paint for Walls
b) Formula:
You should definitely go for a white paint that comes with the best formula ever. Otherwise, the paint won’t last long and come off in no time. Speaking of formula, the paint you are selecting should come with the right texture and consistency. You can choose either oil-based white paint or the latex one.
Speaking of oil-based formula, the component of the formula generally has a strong smell and tough clean-up. It also dries late though oil-based paint is highly durable. However, a water-based formula for painting trim white is also a great option. It comes with easy clean-up and no strong odor. So, yes water-based white trim paint is usable as well. On a serious note, it would be unwise to use water-based paint if the wood trim was already painted with an oil-based one. Read Also: 7 Best Paint for Styrofoam & Foam Board.
c) Shade of White:
Many get confused about the shades as well. However, the answer depends on several factors. You just cannot go for any white shade paint without considering the wall color or lighting shades of your home. However, you will play safe if you go for white paint that is not tinted. The result is quite satisfactory as well.
6 Steps to Paint Wood Trim White without Replacing:
Now that you are already convinced to paint your wood trim white without replacing it, you should know the process as well. Well, when you acknowledge the entire process step by step, it will seem easier to you. Also, if you want to paint your wood trim without sanding, follow the process given below.
But before you get to the process, get all the required stuff near your hand. It will make the process easier.
Required Materials:
- Primer
- Deglosser
- Cleaner
- Wood filler or putty
- Caulk
- rag
- Paint cup
- White paint
- Abrasive Pad
- Paint Brush
- Trim Guard for Paint
- Painter’s Tape
- Paint Tray
- Drop Cloth
All these materials are easily available in your home and nearest local shop. So, grab them all and start with the steps.
Step – 1: Prepping the Room:
Anything you are up to, you need preparation first. Preparing your room is the first and foremost thing before you start painting for humans the wood trim white. If the doors or windows have any furniture near them, make sure you relocate the furniture. Also, do not forget to cover the floor as well. You can use a drop cloth in this regard.
You can also tape off places where you do not want to paint. Use painter’s tape to accomplish this task. This will protect your room and furniture from loose paint.
Step – 2: De-gloss and Clean the Trim:
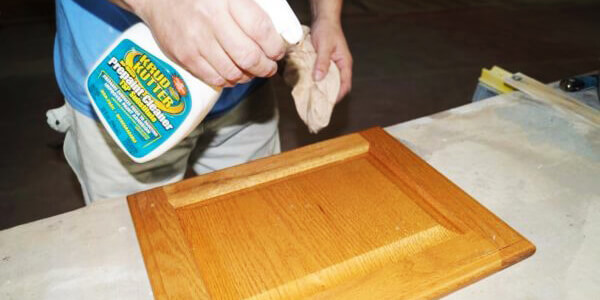
In this case, de-glossing the trim is an optional task. If the wood trim already has any gloss on it, de-glossing would be a wise idea. It will help to adhere the primer and then paint properly to the trim. However, if the trim does not have any sheen sight then there is no need to de-gloss.
You can use a high-quality de-glosser to do this step. Wipe away the wood trim with a rag taking some de-glosser in it. Since de-glosser comes with chemical components make sure you take proper precautions and the working area is well-ventilated. After de-glossing, clean the wood trim with a cleaner. Take some all-purpose cleaner in a rag and then scrub the wood trim.
Step – 3: Fill the holes:
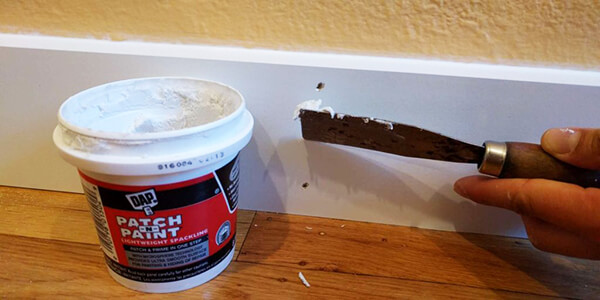
After years of serving, your wood trim must have numerous holes in it. So, it is time to fix the holes and fill them with wood putty. You can also fix the cracks using caulk. You can do this step after priming your wood trim. However many prefer to do this step before using primer.
However, you can use a putty knife for convenient filling of the holes. Dip the knife into the wood filler, grab some filler, and then fill the holes. Wipe away the extra filler using a damp rag and then let them dry.
Step – 4: Use Hand Pads to Rub:
Since sandpaper is not suggested, you can rather use hand pads to give a quick rub and have a quick sanding. It helps to make the surface of wood trim more adhesive. Therefore, applying primer and white paint becomes easier.
Nonetheless, do not forget to wipe away the trim again with a damp rag since rubbing the surface might create debris.
Step – 5: Time to Apply Primer:
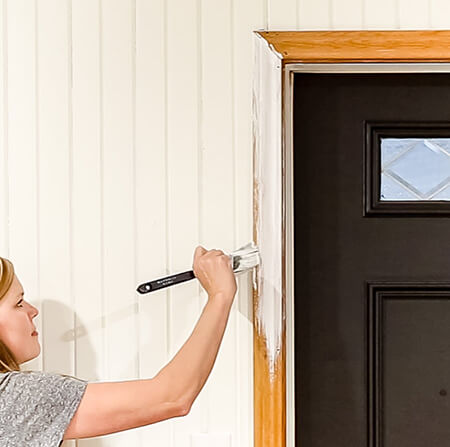
When you are done with all the previous steps, it is time you apply the primer on the wood trim surface. In this case, however, you need to consider the primer formula. If the wood trim already has a dark stain, then a primer with an oil-based formula is an ideal selection. It ensures full and better coverage. Nonetheless, you can use high-quality water-based primers as well.
To apply the primer on the trim surface, use a paintbrush. A 2-inch angled brush would do great. Dip the brush into the primer and then apply with long and smooth strokes. If you see one coat of primer application is not enough, you can go for the second coat. Let each coat dry first before applying another layer.
Step – 6: Apply White Paint:
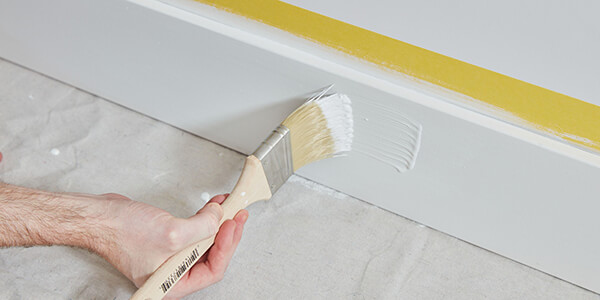
Finally, it is time you paint your wood trim white after priming. As we have already suggested to go for semi-gloss paint, select the paint likewise. This sheen will provide a classic shine to the trim surface. Now, grab a paint brush and apply your desired white paint on the trim surface. One coat of paint will surely not be enough. You might have to apply several layers of paint. It actually depends on the trim condition. If the trim is way older then it will take multiple layers of paint to be covered properly.
After applying the paint, let it cure properly. The final layer of paint will roughly take one day to cure completely. Read also: 6 Best Applicators for Polyurethane.
Things to Consider While Painting:
There are certain things to consider before you start painting your wood trim. Let’s talk about them.
a) Observe the color and contrast of your home wall and lights:
To achieve an evergreen look of your home interior, you must gain some knowledge about this matter. It depends on you if you want a decoration with a neutral look or a contrasting texture of your home. If your home lights and walls are already white then you can paint the trim white as well. but for a contrast look dark wood stain will do well.
b) Make a Virtual Representation:
It is an excellent way to preview your room virtually if you paint your wood trim white. According to the design, you can decide whether to put white paint on the wood trim or not. You can also try different color paint and see the virtual representation to make the best decision.
c) Be careful with historic homes:
It is a very important thing you should never overlook. Since historic homes are exceptional, there should be uniqueness and authenticity while renovating. Many prefer to make the historic room a heavy look with a gloomy and dark vibe. Again, many want to brighten up their homes with white-painted wood trim.

FAQs:
Question: Is painting over wood trim possible?
Answer: Yes, of course! It is possible to paint over old or new or whatever wood trim you have. That is why it is never suggested to replace wood trim. Rather paint it over with whatever color you desire. Just follow the proper techniques and instructions.
Question: Is painting oak trim white worth it?
Answer: Yes, painting oak trim white will offer a versatile white hue to the entire look of your room. It also spreads a fresh and pure vibe brightening up the woodwork. So, painting oak trim white is a wise idea and it is totally worth it.
Question: Is it cheaper to paint wood trim white or just replace it?
Answer: Well, as long as your wood trim is in good shape, replacing them instead of painting is nothing but a waste of money. Many people seek help from professionals for this painting task but it can be done even by an average DIYer. However, professionals won’t charge much for this task. But if you want to replace wood trim, it will surely cost you double. So, painting the wood trim white is cheaper than replacing it.
Does painting wood trim decrease value?
In some cases, painting wood trim in a neutral or modern color can enhance a home’s overall appeal and increase its marketability, potentially leading to a higher selling price.
However, if the wood trim is historically significant, in excellent condition, or part of a specific architectural style that’s highly sought after, painting it may diminish the home’s value to some buyers who value original features.
The key is to strike a balance between updating the trim for a modern look and preserving any unique or historic aspects that add value to the property.
Final Words:
In this guide, we try to discuss all the advantages and disadvantages of Paint Wood Trim White or Replace. if you have a cheap budget, then no need to replace the wood trim. Just follow the process shown above to get a new white wood trim by painting your wood trim without sanding.
Last Updated on October 3, 2023 by Rogers Weber
[As an Amazon Associate I earn from qualifying purchases.]

