Nail Gun Hammer Not Returning – Reasons & Ways to Fix
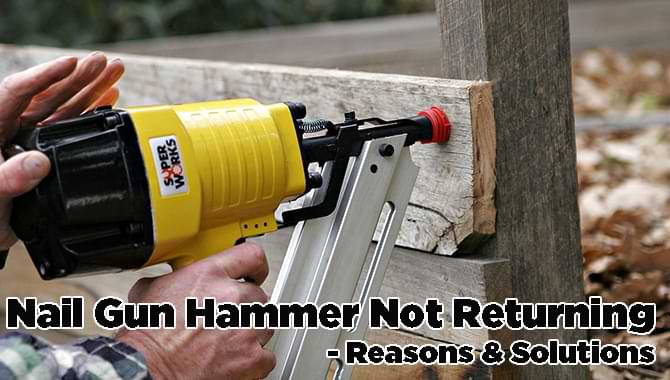
Nail guns are the most useful and powerful tools when you are handling a DIY project. To drive nails, a nail gun makes it easier and quicker. But a nail gun comes with some potential issues as well. As a nail gun has to carry different parts with it to accomplish the job of nailing, some of the parts show some issues that affect the hammer.
It happens so many times that you pull your trigger of the nail gun and the hammer gets stuck with the flow of the pressure and does not return to its first place. When the hammer of the nail gun denies returning to its first place, you assume that there might be some problem inside the nail gun. As most nail guns work with pneumatic energy, this problem is so common.
Therefore, we chose to inform you of the reasons and how you can fix the problem of a nail gun if the hammer is not returning.

Table of Contents:=>
How to Fix Nail Gun Hammer not Returning – Reasons & Its Solutions:
A nail gun is manufactured with different tactics and parts. Therefore, some mechanical issues arise when some internal parts of it carry some problem within. But there are some specific reasons why the hammer of the nail gun creates issues sometimes. If you check out these specific reasons, you’ll be able to fix the problem as well by adopting the right solution.
a) Bent Driver:

One of the primal reasons that the driver of the nail gun is not going back to its first place is for the faulty driver or bent driver. The driver in a nail gun remains on the top of a sole piece unit. It stays attaching the piston into a cylinder. When the user pulls the trigger, the driver and piston assembly get forced by the pneumatic power of the trigger instantly.
Then the whole process creates air in the cylinder and forces it to the down where the nearer nail is in the line to be pushed into a material. In general cases, the piston and driver assemble get back to their places after a nail-shot. But for the bent driver, the assembly of piston and drive will not get back to their first place and stuck in the unwanted position.
Solution: To make sure, if the driver is actually bent or not, you need to go through a wide check of the driver after taking up the quick release. Dissembling the driver and piston assembly is important to check thoroughly. To do that, undo the cap that remains on the peak of the nail gun. This will access you to part the cylinder and assembly of driver and piston. To disassemble the piston and driver, dab the side with a rubberized barrel-shaped hammer and they will be parted nicely.
Now, if you see the driver is bent already, at first you need to lubricate the piston ring with some Vaseline. Then put the assembly of the driver and piston again into the cylinder and then take it back into the housing. Then put the cap in its determined place using a fresh gasket and make the screws a little tight at a time. Do it following a substitute pattern so that the seal sits properly in its place.
b) Leaky Seal:
Sometimes the seal does not help a nail gun for a long time and gets leaked. A little noisy sound is heard from the top of the nail gun when inside the nail gun the seal is leaked, cracked, or damaged unbelievably. Therefore, the hammer refuses to get back to its usual position.
Solution: In a circumstance like that, look into the nail gun properly. First, take aside the cap of the top to check out the seal. If the seal gets damaged terribly, replace it with a new one. Then apply a new gasket and follow the same alternative procedure to tighten up the screws of it. In this way, the seal will be positioned properly.
c) Failure of the Valve:

Not every model of nail gun carries this one-piece piston head valve. But if any model carries, then it remains at the top of the cap. The job of this valve is to control the flow of the pneumatic air in the cylinder.
This way the valve can conduct the air to push the assembly of the driver and piston downwards where the next nail is ready to be shot. If there is any fault in the valve, then the assembly will not return to its place and the air will leak down through the cylinder.
Solution: To find out the problem of the piston head valve, dispel the cap from the head of the nail gun. Then remove the piston head valve from its place and observe if it has any damage that lets the air leak thoroughly.
If the valve seems unable to be used anymore then adopt a new one with new O rings as well. Better lubricate the O rings for better service. Then attach the top with the cap using a new gasket. Follow the same way we told above to seat the seal properly.
d) Dead O Rings:

O rings have the busiest job inside a nail gun. The housing holds the cylinder because of O rings. Also, they seal the trigger valve as well. The failure of the O rings causes the hammer not to return to its first place. If you find out the problem, you need to fix this to make your nailer active again.
Solution: Since O rings are used in different parts for sealing, if one O ring dies, you should change all the other O rings with it. This will save up some time and energy as well since you have to detach all the parts that are attached with O rings. However, to examine the O rings, part the cap from the top. Remove the nose piece from the bottom and the magazine at the same time.
Pull out the cylinder from the housing and disassemble the piston and drive. If needed, use a rubber mallet to tap the side of it to disassemble. Take out the metal ring and O rings. These rings remain around the cylinder and support it. See if the O rings are damaged and irreparable. Then bring a whole new kit of O rings. You’ll get this at a cheap rate.
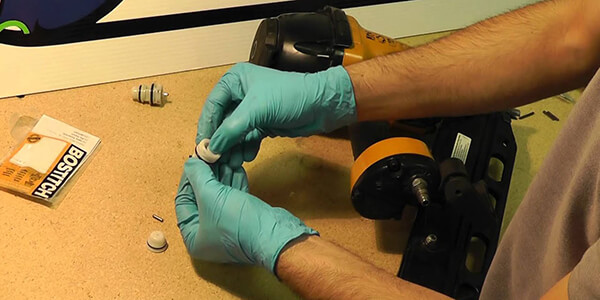
Then pull out all the damaged or old O rings with the help of a small screwdriver. Place the new O rings accurately. For long-term service, use a very little amount of grease or Vaseline on O rings except the one that remains with the nose piece. Then detach the parts where the O rings are situated.
Start with the inside of the valve. There is another O ring outside of the valve. Replace them thoroughly. When you are done replacing all the O rings, reassemble the parts and put them in their usual places again with accuracy. And lastly, follow the same old procedure that’s given above to seat a gasket properly.
e) Damaged Spring:
Spring plays an important role as an inside body part of a nail gun. The assembly of piston and driver never position downwardly. If they do, that means there is a malfunctioning spring that the piston head valve is carrying. A damaged spring works as an obstacle in the way of the airflow and thus the valve fails to control the airflow to do the next job.
Solution: Check the valve if it carries any damaged spring by opening up the cap first. Detach the valve from outside and pull out the ruined spring instantly. Replace with a new spring and then reassemble the outside part with the valve. Put them back to their general spaces and adopt a new gasket to imprint the seal and the top of the nail gun properly to their places.
f) Faulty Gaskets:

Because of damaged gaskets, there can happen incidents like leaking the air or jamming the road of the piston and driver. These reasons leave a solid reason for the hammer that it would not move back to its general spot. Both the top cap and bottom nose piece of the nailer might allow the air to be leaked and create a problem.
Solution: First take an attempt to repair the top of the nailer by adopting a new gasket. Remove the cap by undoing the screws. Wipe out the dirt and debris from the surfaces of the cap and screws with a clean cloth. Put the new gasket in place and tighten the screw lightly following an alternative pattern.
Then take an attempt to mend the bottom part of the gun. Withdraw the nose piece and magazine from the bottom and clean their surfaces properly. Bring a new gasket and install it properly in the same way you did to repair the top of the nailer. Then place the other parts accurately in their old spots.
g) Lack of Oil:
Lubricating the tool is the most useful way to make your hammer return to its old place. Sometimes the nail gun gets jammed if it remains inactive for a long time. If you try to shoot a nail in this condition, the hammer might get stuck halfway.
Solution: To make the tool active again, it requires air tool or nail gun oil. If you pour 4 to 6 drops of oil into the jammed space around the hammer, it will not get stuck halfway. Besides oiling, troubleshoot if requires.
h) Deteriorated Bumper:
The job of the bumper is to rescue the cylinder from getting hit by the piston. But a deteriorated bumper causes a lot of problems. It also affects the hammer and piston in a way that they refuse to return to their places after pushing the trigger.
Solution: To get rid of the deteriorated bumper, detach the parts from the top cap and the bottom nose pin. You’ll find out the cylinder easily after you get through with the undoing process of the top and bottom parts of the nailer. You’ll also have to apart the piston and driver to separate the bumper.
Check out its damages and install a new one. Adopt similar procedures to reassemble the parts of the nail gun that we’ve explained already above.
i) Cracked Piston Ring:
A damaged or cracked piston ring is also responsible for preventing the hammer from going back to its old space.
Solution: Adopting a new piston ring is the ultimate solution to make the hammer active again. Undo the cap and disassemble the piston and driver. Then remove the old ring from the piston and place the new one with it. Grease the ring with Vaseline afterward. Place every other part in their old spot and install and fresh gasket for better service.
j) Worn out Trigger:

If the trigger valve is worn out then it makes many issues including the hammer returning issue. It controls the flow of air in the cylinder and lets the assembly of piston and driver remains downward in some models of nail guns.
Solution: To make the trigger fall, you need to remove the grommet first. The roll pin carries the grommet. If you tap the side of the roll pin, the trigger will come out. If the trigger valve is screwed, then unscrew it. Depending on the model of your nail gun, tap or unscrew. Adopt a new valve and install it properly. Grease the valve with some lube and then reassemble the grommet and trigger again.
Last Updated on July 18, 2022 by Rogers Weber
[As an Amazon Associate I earn from qualifying purchases.]


I have a Ryobi p325 16 g cordless nail gun with the driver/piston assembly stuck in the cylender; took it apart and could not freely push the piston assembly out of the cylender. however I was able to heavily tap the assembly out . O rings looked good but on attempting to insert the piston assembly back into the cyclender, it wedges itself in the cylender extremly tightly. the driver fits and moves smoothly in cylender. tool was not dropped and the cylender shows no sign of bumps or damage. what causes this ??