How To Make a Picture Frame With Glass & Wood: 7 Effective Steps
A picture frame protects a beautiful picture and upholds its beauty in a very unique way. Making a frame can be your DIY project as it is fun in many ways. However, a frame can be made with many materials. But have you noticed a picture frame made with glass looks how sleek and vivid at the same time?
If you are a DIYer and love to take new projects in hand then you should take the project of making a picture frame with glass. To make your ways easy, we are going to provide you with the aspects of how to make a picture frame with glass and wood. So conspicuously that you’ll not instantly be inspired by it. By adopting the aspects you can confine your captured memory, paintings, favorite journals, and many more with precision.
So, without further ado, let’s see what steps you should take to make a glass picture frame.

Table of Contents:=>
- 7 Steps Process to Make a Picture Frame With Glass & Pine Board:
- Step 1: Materials You Need to Collect:
- Step 2: Measure and Cut the Pine Boards:
- Step 3: Drill Holes and Align the Pieces of Board:
- Step 4: Install Dowels to Create Groove:
- Step 5: Stain the Frame and Cut the Glass:
- Step 6: Attach the Glass, Picture, and backer Panel:
- Step 7: Screw Saw Tooth Hangers:
- How to Frame Glass Painting:
- FAQ:
- Conclusion:
7 Steps Process to Make a Picture Frame With Glass & Pine Board:
Making a picture frame with glass might require a lot of things including some fasteners. But here, our purpose is to lead you to an easy solution to it. Therefore, you’ll not need any extraordinary tools to complete the framing job. Now let’s follow the steps one by one so we can reach our motif of making a fine picture frame with glass.
Step 1: Materials You Need to Collect:
First thing first, it requires some important materials without which you cannot carry on with your project. Therefore, make sure you are fulfilled with the following materials at once.
- Pine boards
- Wood screws and pocket hole screws
- Instant wood glue
- Miter saw
- Drill machine
- Fender washer and face clamp
- Sawtooth hangers
Step 2: Measure and Cut the Pine Boards:
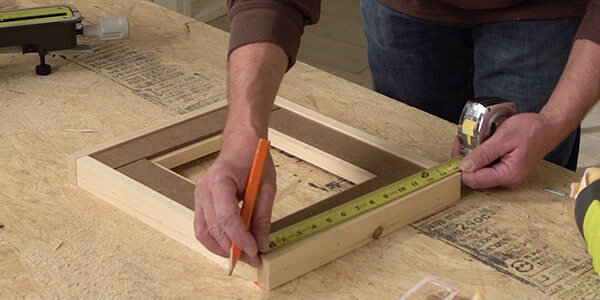
As you are going to frame the picture or painting with a pine board, you need to measure it and cut it. To measure the board, you need to measure the picture and then cut the board precisely. It will require 4 portions of the pine boards with a perfect size according to the picture size.
After you get the exact measurement of the board, cut them with the help of a miter saw. Make sure you are cutting the board into four pieces accurately and cut the end of each piece at a 45 angle because this angle helps in fitting with the other end of a cut pine board.
Step 3: Drill Holes and Align the Pieces of Board:

In this next step, you are supposed to drill to create pocket holes near the diagonal edges of the board. Do the drilling process on each piece one by one. Then to align the pieces together, you need to use wood glue. Spread the glue on the angled-cut sides of the pieces of boards. Then connect the mitered corners of the pieces with one another.
Put the boards on a flat surface following an alignment that a frame requires and then clamp them together. Also, put pocket screws in the holes you drilled earlier to stabilize the alignment and make it durable.
Step 4: Install Dowels to Create Groove:

The next job is to create a groove line inside the pine board frame that has been aligned already to fit the glass in it. By creating the groove you’ll eventually learn how to secure the glass in a picture frame. To set the glass perfectly, adopt print, square dowels, and backer panel. You will find these materials at any home depot center.
Now take the measurement of the frame from inside. Then size up the dowels with the meter to make it fit for the glass inside the edge of the frame. Then align the mitered dowels together by gluing and clamping them. After they get dry, place them inside the edge of the frame and use 23 gauge nails to make the frame and dowels stable in their places.
Better not use 18gauge brads as it will destroy the delicacy of the wood and make it fatal.
Step 5: Stain the Frame and Cut the Glass:
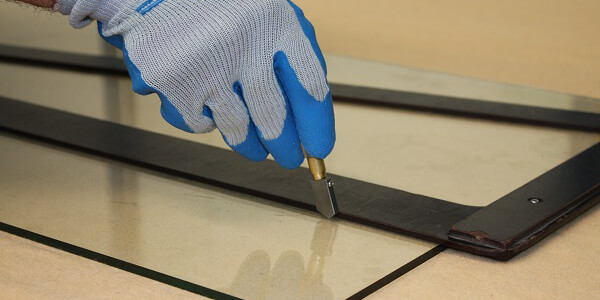
After that, you can stain or paint the frame as per your wish. You can give it a raw and vivid color of wood to make it look sophisticated. After that, you need to form your glass into a perfect size following the size of the frame. You can cut the glass by yourself. But it would be safe if you take help from any Home Depot.
Step 6: Attach the Glass, Picture, and backer Panel:
The next step will teach you how to frame glass with wood perfectly. You can certainly use a strong adhesive to attach the glass with the pinewood frame. Epoxy can cover up the job finely. But in this case, the glass will be tacked with the wooden board so significantly that you’ll not be able to change the frame of the picture later if you want to.
Therefore, it’s more convenient to screw fender washers because you can part the frame of the picture from the glass later by undoing the screw only. Also, in this way, you can get the high security of the glass in a picture frame. To screw the fender washers you need to flip the whole frame and then align the glass, picture, and backer panel respectively in the groove. Set the fender washers at the edge of the frame slightly covering the backer panel.
Screw them tightly and this will hold the whole alignment in place snugly.
Step 7: Screw Saw Tooth Hangers:
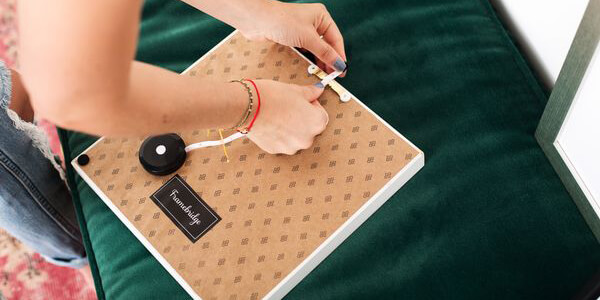
In this last step, to hang your picture on the wall, screw saw tooth hangers on the back of the frame. And hang it on the favorite spot of your wall. And that’s how you complete your project on making a picture frame with glass.
How to Frame Glass Painting:
Glass painting is a different level painting for sure. And to protect the painting for years, you can simply frame it. You can adopt the easiest way of framing to preserve your glass painting. And for this, you don’t have to require any kind of fasteners and hassle. So let’s dive into the process already.
Step 1: Make the Frame with Cardboard:
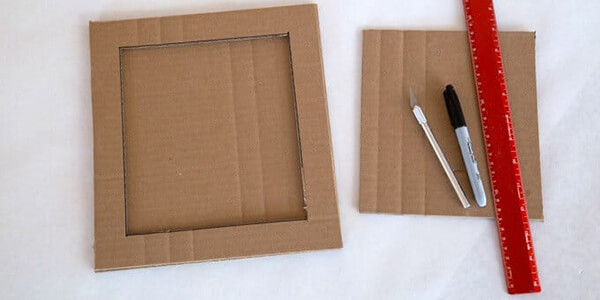
To make the frame you’ll need cardboard. Cardboard is cheap and can be gotten anywhere. We will not think of making a wooden frame because that will require more work and devices at the same time. Cut the board with an anti-cutter in a square shape so that the glass painting gets fit inside the frame. You can paint the frame nicely making a contrasting view with the picture to make it more attractive. After painting, let the frame dry.
Step 2: Make the Base Board:
Baseboard is important to hold the glass painting snugly. It makes the frame solid for the glass painting. Use cardboard again to do the job. Cut it in a bigger size than the size of a glass painting. Make sure it’s larger enough to cover the edge of the frame.
To make the glass painting pop up, wrap up the base with aluminum foil paper. The transparency of the glass painting looks gorgeous when the base in the back is warped up with foil paper. Besides, it helps the glass painting to provide a vivid vision to the audience.
Step 3: Use Two-Side Tape:
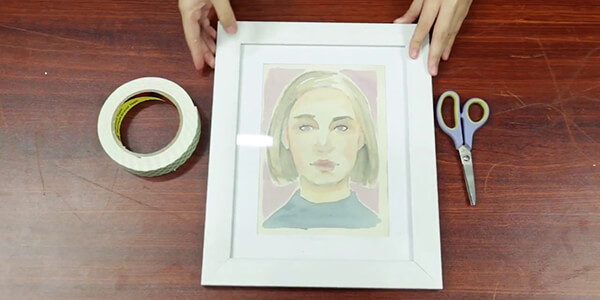
The two-side tape makes the work easier for sure and it’s available at any store. Now, use the two-side tape to the backside of the glass painting and tape the edges of the painting only. Also, tape the edges of the frame in its backside. Press the tape gently to get the grip of it.
Step 4: Peel off the Cover of the Other Side of the Tape:
After that, peel off the cover of the other side of the tape from the frame gently. Then place it over the glass painting to set it together with the help of the grip of the two-side tape. Then press the edge of the frame gently so they stick to each other properly. Do not press too hard because it can affect the glass painting badly.
Then remove the cover of the two-side tape from the glass painting in order to place the baseboard at the back of it. Press the edges of the baseboard with the glass painting and frame so they get attached to each other snugly.
That’s how you’ll get a strong frame for your glass painting that you can also hang on your wall by attaching or screwing a sawtooth hanger at the backside of the baseboard.
FAQ:
Question: How can I frame a picture cheaply?
Answer: To get a beautiful frame without costing much money, you can simply adopt the steps that we’ve delivered for the glass painting. Cardboards, two-sided tape or glue, scissors, and glass are the primal material with which you can get the satisfactory result without even spending much penny of them.
Also, you can save much time and it will not even require nail guns, miter saw, or any other fasteners.
Conclusion:
A fender washer and face clamp is an important tool to make a picture frame with glass and wood. Some power tools are also required, but without having any power tools, you need to think of any alternative ways. To create a picture frame with molding or cardboard and glass, you need to follow the same above process. So, let’s start to make your own picture frames, it’s easy.
Last Updated on November 11, 2021 by Rogers Weber
[As an Amazon Associate I earn from qualifying purchases.]


