How to Install Quarter Round without a Nail Gun
Though with a finish nail gun attaching quarter round becomes easier yet without a nail gun it is possible. In fact, most household knows the tricks since without a nail gun it is not that tough. Therefore, if you are here, you must be in search of how to install quarter round without a nail gun. Well, there are obviously some other ways too.
However, quarter rounds are used to give the rooms a finished look. They are basically, one kind of shoe molding. They offer great help to cover the gaps between baseboards and floor. They also provide an elegant edge finish attaching to the corners of walls or wooden floors.
To have a stylish and significant border around your room, these quarter rounds come stained or painted as well. Moving to the main part, let us bring you an elaborated discussion and ways of installing a quarter round without a nail gun or nails.

Table of Contents:=>
2 Ways To Install Quarter Round Without a Nail Gun:
Installing quarter rounds increase the beauty of a room. Homeowners usually install them to hide the base defects created between the floor and baseboards. Quarter rounds, however, also added on around the stairways or windowsills.
They not only create an elegant look but also increase durability. Nonetheless, to install a quarter round apart with a nail gun, we can also use a hammer or glue. Though hammer is somewhat an old-fashioned way yet, it is a good option especially when you don’t have a nailer.
Way 1. by Using a Hammer:
Hammer is the second option anyone can think of after a nail gun to install quarter round. However, there is a simple procedure when you are up to install quarter rounds with a hammer. Let’s discuss the procedure step by step for your convenience:
Step – 1: Cleaning the Place:
Cleaning the place where the quarter rounds will be installed is the very first thing to do. You need to keep the wall corners of your room clean before installing quarter rounds. Brush away especially the corner areas to get rid of dust and debris. Wipe along the wall edges and other essential places.
Step – 2: Cutting of the Molding:

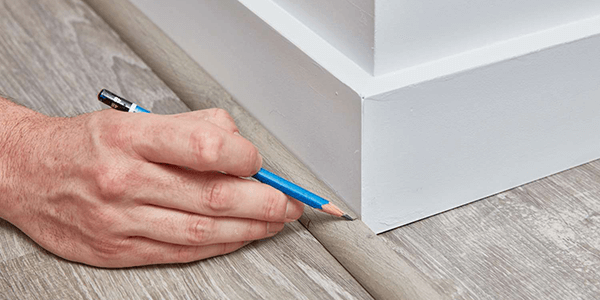
Now, this part is very important and crucial. Also, requires carefulness. It is necessary to cut the molding according to the baseboard length. For this, you need to lay the whole molding in opposition to the baseboard. Now, mark the baseboard edges using a pencil.
This marking also indicates the wall corners. Now, to cut the quarter rounds along with the pencil mark, you can get a miter saw. To cut the molding with a miter saw place it at an angle of 45-degree. However, you have to ensure that the adjoining quarter round also has an opposite cut of 45-degree.
In that way, both the two pieces can be placed together without having any gaps in between. Again, many want to make a straight joint with the quarter rounds. In that case, you can simply cut them in opposite directions at angles of 30 or 45-degrees.
Step – 3: Placing Quarter Round Flush:

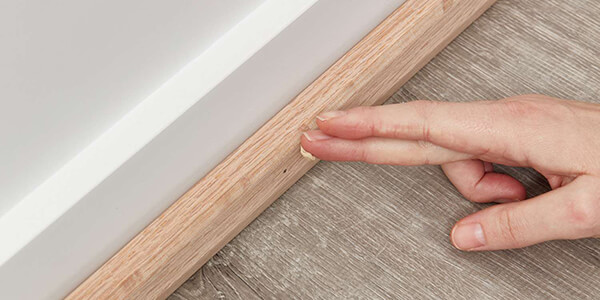
When you are done cleaning the place and cutting the molding, move to the third step. Set the first flush of the quarter round starting from any end of the wall. If necessary, to place the quarter round properly butt it to the corner or wall.
Step – 4: Nailing Quarter Round:

You will certainly need finish nails for nailing the quarter rounds. Nails of 1-1/4-Inches are suitable for this purpose. Exactly at the middle of molding hold a nail from 2-inches of the edge. Point it in a way that creates a parallel situation with the floor.
Now, hammer the 1-1/4-inch nail till it reaches the baseboard passing the quarter round. When the nail goes through about 1/8-inch of it, cease hammering. After that, get a nail setter. With it make a align with the top of the stuck nail.
When you are done with the alignment, hammer the setter till it completely goes inside the quarter round.
Step – 5: Keep on Nailing:
In this step, grab more finished nails to continue the process. Keep on hammering the nails by keeping a 2-feet distance from each nail. Carry on nailing until the nails cover the whole baseboard length. Nonetheless, you have to be careful while nailing.
Do not nail the quarter round into the floor. The nails are only meant to be nailed into the baseboard or wall only.
Step – 6: Filling Nail Holes:

The process of nailing along with the entire quarter round produces slight wholes on it. Therefore, you need to fill the holes. Using wood putty will be a great choice to cover the holes. After applying the wood putty make sure to dry it completely. Check Out more => Wood Filler Vs Spackle – Differences & Uses.
Step – 7: Sanding and Painting:

When the holes with wood putty get finally dried, sand it slightly. Do not do the mistake of sanding roughly, it will ruin the quarter round. When you are done sanding, stain or color the wood to have a consistent tone of whole rounds. However, coloring the wood is optional. Read Also: Difference Between Wood and Concrete Drill Bits
Way 2. Installing Quarter Round without Nails [by Using Glue]:
In case you do not have nails to install quarter round, you need to go for an adhesive then. And maximum time people think of glue as the adhesive to do this job. However, installing quarter rounds with glue is a simple process.
Install Quarter Round Using Glue or Caulk:
Well, as we mentioned, using glue for this purpose doesn’t require tough steps. You will believe it when you know the steps:
Step – 1: Cleaning the Area:
While using an adhesive especially glue, make sure you clean that area first. Otherwise, it won’t stick precisely. Therefore, clean the surfaces properly.
Step – 2: Measuring and Cutting:
Now, in the second step, measure the quarter round according to the baseboard. After measuring make a mark and cut it with a miter saw. Make sure the cut fits the length of the baseboard.
Step – 3: Sanding Quarter Round and Baseboard:

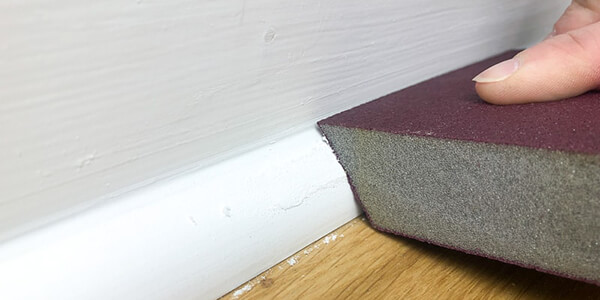
In this case, you need to grab medium-grit sandpaper. But, scuffing or sanding with sandpaper should be done very carefully. With the sandpaper, rub that side of the round which will be attached with the baseboard.
Nearly five strokes of the sandpaper are enough to achieve the perfect texture of the quarter round. Again, scuff the baseboard as well where you will set the quarter round. Here also, only five strokes will be enough. This way, you can develop adhesion between the baseboard and quarter round.
Step – 4: Applying Adhesive and Attaching:

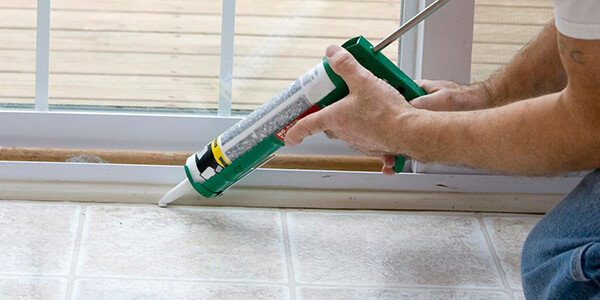
After sanding, it is time to apply glue on the quarter round. Apply it only to the scuffed or sanded side of the round. After applying glue or caulk, attach the quarter round to the expected place of the baseboard. Press tightly to set the quarter round properly.
Keep holding the molding for a minute or two against the baseboard. It will enable them to create a strong and powerful bond.
Step – 5: Cleaning up Mess:
Now, the glue will certainly create a mess in the working pieces and environment. Hence, cleaning off the mess is important. Since the glue is a sticky substance, you can use a damp rag or sponge to wipe away the extra glue from the ledge of the two pieces.
Step – 6: Repeat the Process:
Redo the above steps to attach the rest of the quarter rounds to your baseboard.
Should You Use Glue or Caulk to Install Quarter Round?
Well, ‘installing quarter round without nails’ comes with the only solution of using glue. But there are some downsides of using glue in this process.
- If your baseboard is painted then there are chances the glue won’t stick properly. Painted surfaces are not suitable and glue fails to stick on them. Thus, you may become dissatisfied with the adherence properties of glue.
- Applying excessive glue creates a messy environment. Hence, the adhesive becomes troublesome. Moreover, it can spill accidentally over to your floor as well. It creates a displeasing sight of the floor.
- Also, using glue can create a huge problem at times when your rooms will require renovations. After sticking with the glue, removing the quarter round from the baseboard becomes harder.
- Moreover, glued rounds are less durable and sturdy than the nailed quarter rounds.
- Again, if the glue comes in poor quality, it will create chipping of the quarter round moldings.
Some Tips for Installing:
Following some tips and tricks while installing a quarter round without a nail gun can bring you the desired result.
1. Cut at the Right Angle:
For cutting the corners of the quarter rounds make sure to have the right angle. Otherwise, it will cause a messy joint of the quarter rounds. Most of the time the molding pieces are cut at an angle of 45-degree at opposite sides.
2. Fill the Gaps:
Many times, even though you cut the moldings at the proper angle, still gaps between the rounds can be found. It occurs when you work with old baseboards. They are more likely to expand or contract over the years and get tear and wear.
In this case, wood putty brings a great advantage. So, to fill the vacuum place use wood putty. Again, if you find color differences, cover them with the final coat of paint.
3. Wipe Excess Glue before Dry:
There are chances that excess glue will exude from the joints or edges of the baseboard over time. It ruins the floor. Therefore, wipe the excess glue at once before it oozes and gets dry.
4. Take Care of the Holes:
Where there is working with nails, nail holes production is a must. Hence, you need to take care of the holes. However, if fastener heads become a problem, you can make them unnoticeable by sealing them.
Applying a good sealant over the fastener heads can makeover this situation. However, to set the sealant properly when it dries, you can sand it mildly with 180-grit sandpaper.
5. Predrill to Avoid Splitting:
While nailing, the splintering of the molding occurs and it is quite obvious. However, if you want to avoid this situation, you can predrill the holes for fasteners.
Final Words:
Now that you know, how you can install quarter rounds without nail gun or nails, make sure you pursue the methods only when you are skilled. You can use both adhesive or hammer for nails to adjoin the quarter rounds. But these tasks will require expertise.
Nonetheless, to install quarter rounds, nail guns provide a great finish. Having a nail gun is a great investment. Until you are a professional, you will hardly think of buying a nail gun. Therefore, DIYers can follow the ways and steps given above.
However, if you are going for other ways make sure of the quality. Always go for high-quality glue instead of cheap ones. Also, while hammering be careful!
Last Updated on July 10, 2021 by Rogers Weber
[As an Amazon Associate I earn from qualifying purchases.]


