Fill Nail Holes in Drywall without Painting: In 5 Easy Methods
While redecorating your room, you must take down the pictures and find tons of nail holes in the drywall. Well, we know, these nail holes are nothing but a headache and you do not find peace until you fill them. But the problem arises when you find the process is extensively time-consuming. Also, the trouble of finding paint that matches the color of drywall is truly exhausting. So let’s go to solve the problem of how to fill nail holes in drywall without painting.
Therefore, many people are actually looking for ideas to fill nail holes in drywall without painting. Fortunately, it is possible to regain an unblemished and smooth wall if you know the proper techniques and have the right tools. Only these things can vanish all the signs of wall-mounted shelves or coat hooks that were once hung in your drywall.
Nonetheless, today, you are in good company since we are here to let you know how to fill nail holes in drywall without painting. Relocating your art, pictures, clocks, calendars, and shelves will be easier again. So, stick with us till the end to be acknowledged with the ideas we are giving below.
Table of Contents:=>
- How to Fill Nail Holes in Drywall without Painting – 5 Effective Ways:
- Method 1. By Using Lightweight Spackle:
- Materials Required:
- Step 1: Pull out the Nails First:
- Step 2: Prepare the Wall by Sanding the Surface:
- Step 3: Apply Spackle Using Putty Knife:
- Step 4: Smooth out the Spackle on Drywall:
- Step 5: Let the Spackle Dry:
- Step 6: Sand the Top Layer of Spackle:
- Step 7: Wipe off the Sanded Areas:
- Step 8: Dry off the Wall:
- Method 2. By Using Toothpaste to Fill Drywall Nails Hole:
- Method 3: By Using Glue to Fill Wall Holes:
- Method 4. By Using Baking Soda:
- Method 5: By Using Soap:
- Can Caulk be Used to Fill Nail Holes in Drywall?
- Conclusion:
- Method 1. By Using Lightweight Spackle:
How to Fill Nail Holes in Drywall without Painting – 5 Effective Ways:
Method 1. By Using Lightweight Spackle:
Till now spackle is the Best Nail Hole Filler material to fill nail holes in drywall. It comes with an easy application as well. Hence, lightweight spackle is recommended for this process. however, painters and professionals out there generally use shrink-free spackles for this purpose. To proceed with this process, you will need some essentials that are available near your hands.
Materials Required:
- Lightweight spackling paste
- Hammer
- Putty knife
- Large sponge
- Sanding block or sandpaper
- Clean cloth or rag
Basically, lightweight spackle does not create harsh edges while using. Its material is not thick and it also does not weigh much like some of the typical spackles. It won’t look so great when the putty leaves a harsh edge on the wall. Therefore, to make the job easier and have a smooth finish picking up the lightweight spackling paste is a wise decision.
Filling Nail Holes in Drywall with Spackle – Step by Step:
Step 1: Pull out the Nails First:
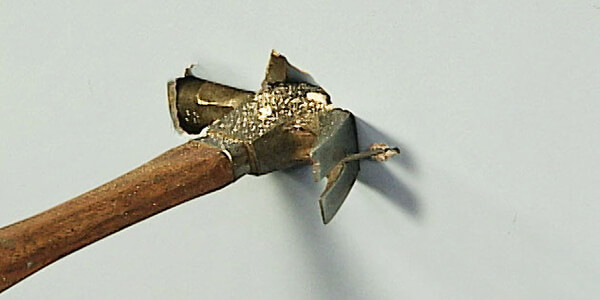
In case, you have not yet pulled out the nails from your drywall, then pulling them is the first thing to do. Use the hammer back to pull out the hooks or nails that are stuck in the wall. Simply place the back of the hammer with the nail while sliding it up. The nail’s head will fit into the back of the hammer. When it gets fitted, keep pulling the hammer towards you. At a certain point, the nail will pop out from the wall, and surely, you will discover a hole in that place.
Step 2: Prepare the Wall by Sanding the Surface:
Before applying spackle, prepping the wall is important. Otherwise, you won’t get a smooth result. When you pull out the nails, you will see some chalky gypsum elements are also coming from the wall. Removing the traces is important. Using a sanding block of 220-grit will be helpful in this case.
Sand the holes with this fine grit sand block and remove the ridges. Sand in a circular motion over the holes of drywall only.
Step 3: Apply Spackle Using Putty Knife:
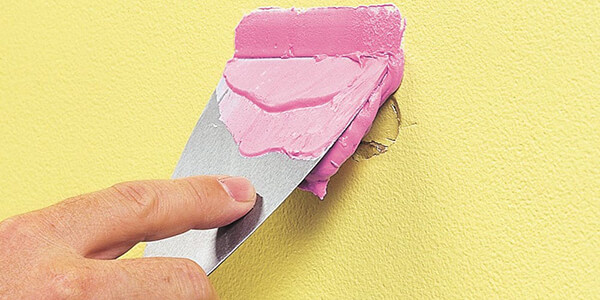
After sanding over the nail holes, you need to fill them. Grab the lightweight wall spackle and a 2-inch putty knife for this purpose. Dip the end of the putty knife into the spackle and grab a small amount of spackle. Now, push the spackle into the hole until it gets filled. Usually, putty knives are likely to be flat and skinny. Their structure makes the application of spackle or any filling material easier.
Step 4: Smooth out the Spackle on Drywall:
After filling the nail holes with the spackle, remove the extra spackle compound with the help of the putty knife. drag the knife from up to down around the hole to take away unnecessary spackle. This will smooth out the wall already.
Well, try to stick to the edges of the holes while doing this process. Do not push the putty knife into the nail holes. It will make dents again in the holes which are surely not expected.
Step 5: Let the Spackle Dry:
When you are fully done with the spackle application, let it dry completely. It will barely take one or two hours to dry. For quick drying of spackle, set a fan towards the drywall and let it run for a few hours. Do not get started working on it until the spackle in the holes dries properly. If you try to work on it without letting the spackle dry, then there are chances that the material would come off from the wall within no time.
Step 6: Sand the Top Layer of Spackle:
When the material finally dries properly, start the work again by sanding the top layer. A fine-grit sandpaper or sanding sponge can be used. Use it on the top of the holes that are filled with spackle. Just rub the place slightly without pushing too hard. Do the process in a way that it gets flushed with the wall seamlessly. Read Also: 8 Best Sander for Trim Work & Baseboards [2021 Reviews]
If you do not sand over the spackle, it will leave shiny spots. Covering up these shiny marks becomes hard later since they do not go with the wall texture at all.
Step 7: Wipe off the Sanded Areas:
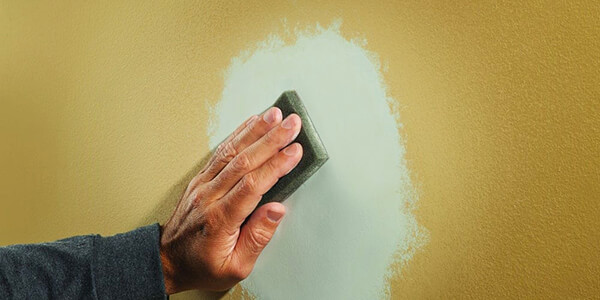
Now it is time to wipe off the areas where you have just sanded. A large and soft sponge will be required for this purpose. Dampen the sponge with warm water. When it gets wet properly, rinse the extra water by squeezing the sponge. Make sure to wring the sponge well so that it does not drip water. Otherwise, while wiping, the sponge will drip water and leave water marks on the drywall.
Moreover, if the sponge is too wet, it will dampen the spackle as well. As a result, it can break the spackle top layer of the wall. Swipe the sponge over the sanded spackle back and forth. Remove the spackle particles or white dust and clean off the hole surroundings as well.
Step 8: Dry off the Wall:
Coming to the final step, dry off the drywall with a clean rag or cloth. Make the area clean by rubbing the cloth over the place. swipe away all the spackle that was left on the wall. Clean in a way that the area looks smooth and achieves a great finish covering all the holes.
Other Materials to Fill Nail Holes in Drywall without Painting:
There are some other materials available near you that can be used for the exact purpose. These materials may not serve you for the long term but surely, they are great for quick fixing. Let’s get to the materials.
Method 2. By Using Toothpaste to Fill Drywall Nails Hole:
After spackle, toothpaste is another inexpensive material to be used for filling nail holes in drywall. Using toothpaste also makes the task easier and is a great alternative to paint or spackle. However, with toothpaste, the process is almost the same. Look!
Step 1: Find a Toothpaste that matches the Drywall Color:
It is possible to find a tube of toothpaste, that almost matches the drywall color. It will help to flush with the wall perfectly with smooth finishing.
Step 2: Make a Mixture of Toothpaste and Aspirin:
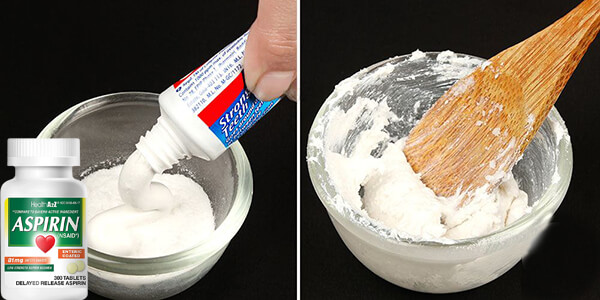
To have a better result, you can mix toothpaste with the aspirin tablet. Crush the tablet first and then mix the powdery aspirin with toothpaste. This mixture is a great help to crack on drywall. It will make the wall more seamless covering the nail holes properly. If you do not want to paint your drywall afterward then you should really go for this toothpaste mixture.
Step 3: Apply the Toothpaste and Remove Excess Product:
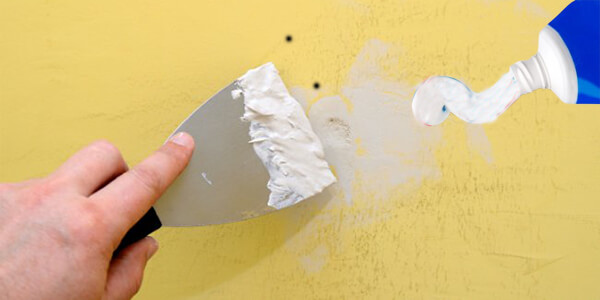
Using the same putty knife, press a small amount of toothpaste from the tube or take the mixture. Then directly apply to the holes. Remove the excess substance using the putty knife. Or you can use a playing card as well to remove the unnecessary product.
Step 4: Let the Product Dry:
Like the previous way, let the mixture dry inside the nail holes. It will cause the same result if you do not let it dry completely.
Step 5: Finally, Sand and Swipe the Dust:
As we have already mentioned, the finishing process is all the same. Just sand the nail holes with fine-grit sandpaper and then wipe away the dust with a damp cloth. You will surely get a great result.
Method 3: By Using Glue to Fill Wall Holes:
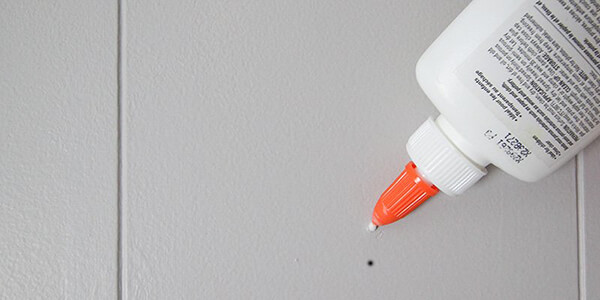
To achieve a quick DIY trick, you can also use glue to fill nail holes in drywall without painting. Pick up the best glue from the market and press the tube into the nail hole directly. Fill carefully so that it gets flushed with the drywall.
After applying let the glue dry. When it dries and hardens, remove the extra product. Walls with light color or white color would be best for using this product. Moreover, this is probably the simplest way to fill the nail holes. The process does not require any other tools like sandpaper, spackle, putty knife, or anything else. Hence, you can certainly give this product a try.
Method 4. By Using Baking Soda:
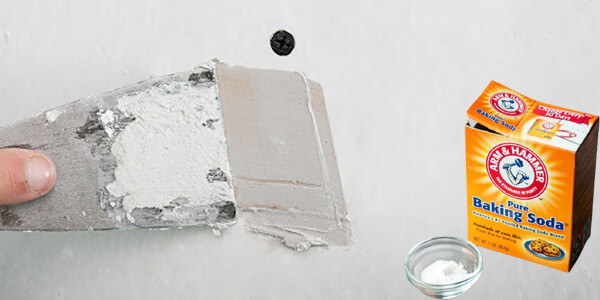
Though spackle and toothpaste are materials that you can get at your home still if these do not work, you can go for baking soda. Baking soda with liquid glue makes a great mixture to fill nail holes. However, make sure these two materials create a thick mixture. Otherwise, it won’t fill the holes completely.
When you make a thick paste of liquid glue and baking soda, apply the paste with a putty knife in the nail holes. After applying, scrape off the extra paste and then let it dry. This paste will work great on walls with off-white or white color. However, if you are applying this paste on a colored wall then apply in an infrequent manner.
Method 5: By Using Soap:
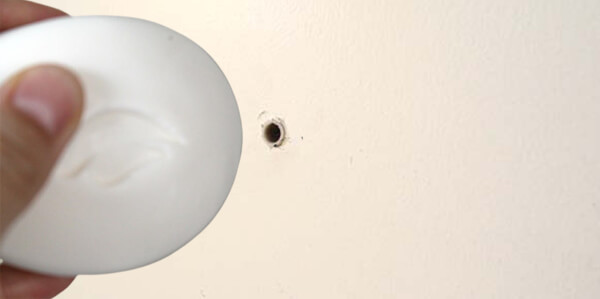
Surprisingly, soap can also be used to fill nail holes in drywall without painting. You can use this product as your last option since it is not going to offer you a long-term service. If you just want a quick fixing of the nail holes only then think of using soap.
However, the process of filling nail holes with soap is easy. Just rub the soap bar over a hole until it gets filled. Swipe away the excess soap slightly using a damp rag. Fortunately, there are multiple color options available for a soap bar. So, you can select any color that matches the color of your drywall.
Can Caulk be Used to Fill Nail Holes in Drywall?
Many misunderstood thinking caulk and spackle as the same product. But they are not similar. Though both products are used for filling nail holes and cracks of surfaces yet they have differences. Caulk is surely a great and flexible coating. But for interior use, this product is not recommended usually. Especially, for wood-made walls, caulking is not a good idea.
Moreover, for being highly flexible, caulk gets shrunk over time. As a result, it also leaves a divot in the drywall. On the other hand, the spackling compound is more likely to be hard when dries. It is also not resistant to water. Yet, spackle makes the best filling when it comes to interior surfaces especially, drywalls.
Conclusion:
Now that you have ideas about several filling products you know how to fill nail holes in drywall without painting. However, the most recommended product for this purpose is putty or spackle. Filling small nail holes is basically a DIY job that is not very tough to do. And with spackle, it becomes way easier.
However, you can also go for homemade remedies like making a paste of flour, primer, and salt and apply the paste in the holes. Also, baking soda and glue together make another DIY paste to serve this same purpose. So, whether it is a household item, homemade remedy, or commercial product, you can use any of them easy to fill nail holes in drywall.
Last Updated on October 21, 2021 by Rogers Weber
[As an Amazon Associate I earn from qualifying purchases.]


