How Many Coats of Polyurethane on Kitchen Table? Step By Step Guide
Who doesn’t love to get a nicely coated kitchen table? But sometimes, a nicely coated kitchen table can be brittle. It means the coating needs to be tough as well. If you use professional coating elements like urethane, polyurethane, only then you will have a tough kitchen table.
However, while selecting the polyurethane, it is essential to decide the correct form of polyurethane. Because polyurethane is available in water-based and oil-based.
Due to low VOCs, water-based polyurethane dries fast. But if the coating gets thick, your kitchen table will look plasticky. On the other hand, oil-based polyurethane isn’t being so commonly used. Sometimes, it is unavailable on the shelves of stores also.
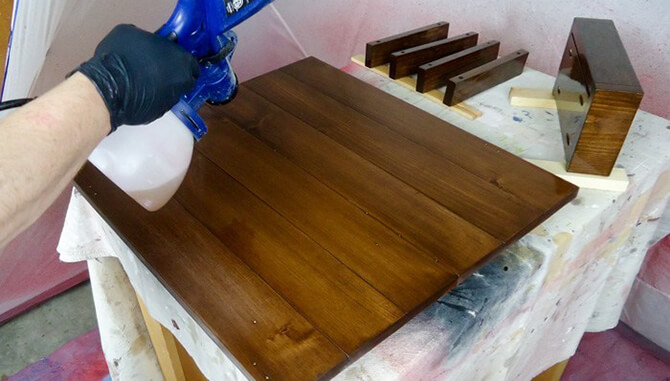
The standard way of applying polyurethane is spraying. But if you are sensitive to VOCs, then you should choose to brush your kitchen table using polyurethane. To minimize the sticking, you can choose a foam brush also.
So, now the question is, what polyurethane form will you use? And how many coats of polyurethane on the kitchen table can you apply? No worries, in this article I am going to give you a piece of detailed information about all your questions. Let’s fasten the seat belt and take-off for the discussion.

Table of Contents:=>
- Water-based or Oil-based – Which Option to Select?
- Difference between the water-based and oil-based polyurethane
- What to Look for While Working with Polyurethanes?
- Preparation of the Wood
- Tips on Applying Oil-based Polyurethane
- The application process of Oil-Based Polyurethane
- Tips on Applying Water-based Polyurethane
- How Many Coats of Water-Based Polyurethane Apply on Kitchen Table:
Water-based or Oil-based – Which Option to Select?
The answer to the headline question is with you. Yes, it depends on your project and personal preference. You can easily apply oil-based polyurethane, and characteristically it is placid than water-based formula. Generally, it is thick and needs to apply 3 – 4 coats on the kitchen table. Whereas, 4 – 5 coats of water-based polyurethane are enough to get a shiny finish of the kitchen table.
Difference between the water-based and oil-based polyurethane

Oil-based polyurethane keeps the sign of brush on the kitchen table and takes a long time to dry. Thus, your project timeline increases and there is a chance that bugs may attack the table before it dries correctly.
Water-based polyurethane takes less time to dry. Also, its self-levelling is a bit more stable than oil-based. Besides, they are less smelled as well. But they have a downside too, which is, the grain of the wood may rise due to water-based poly. And if you apply it over a few wood stains, it shows temperamental character.
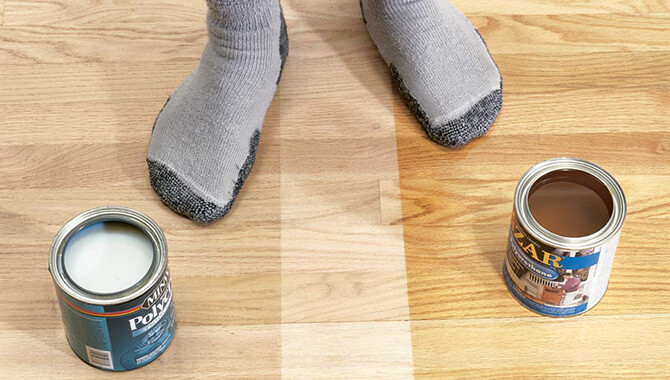
Another differentiator is color. If you want to add a wide amber glow to your table, choose oil-based poly. Notably, lighter wood species like oak, birch, and to name a few will give you an amber glow.
While applying, water-based poly will give you a milky white polishing, and after drying, the colour gets more apparent day by day.
What to Look for While Working with Polyurethanes?
Firstly, remember that there is no chance of shaking the can of polyurethane. If you do this, while applying, you will find a lot of bubbles in the product. And these bubbles will show up after the final process. So, before starting every process, give a gentle stir, and start applying.
Also, place the table in a well-ventilated area where air circulation is good enough and then apply polyurethane. Usually, polyurethane takes an hour to dry, and dust may fall on the table. Both types of polyurethane give strong fumes while drying. Without correct ventilation, you should not start applying polyurethane. Remember, not to work outside where you can’t control dust, bugs, and other flying objects that can ruin your final finishing.
It is advisable to apply polyurethane on a flat surface. Thus, the finishes get self-level, and the chance of dripping is also less. Polyurethane will drip on vertical surfaces for sure. You can minimize the problem if you choose to apply a thinner coating. Wiping on and spraying is the best option to create thin coats. After taking all these precautions, if still, you face runs or drips, keep a razor with you. And using this razor, carefully remove the runs or drips.
After completing every layer of the coating, use a bright light to check the work. If the light is reflecting out of the surface, it is the indication of imperfections. Imperfections like bubbles, spots, horrid brush marks, etc. Fix these imperfections when the coating is still wet, not after it gets to settle down.
Preparation of the Wood
All good finishes depend on the pre-preparation. Similarly, if you want an impressive final finish, the wood surface has to be smooth and clean before applying the poly. Take 220 – grit paper to sand the wood. If your kitchen table is made of oak or ash, take a wood grain filler and apply it before the poly. Ultra-smooth surface is inevitable in terms of getting an excellent finish.
Generally, sanding dust will always be present on the wood surface and thoroughly clean them using a tack cloth. You can choose a vacuum cleaner also if it is available with you.
Tips on Applying Oil-based Polyurethane

Oil-based polyurethane is essential to get beautiful finishing on kitchen cabinets or pieces of furniture. To get thin oil-based polyurethane, mix it with mineral spirit. But the majority of the time, this mixing is unnecessary. The product label contains the manufacturer’s recommendations, so before mixing, flip through the procedure from below.
The application process of Oil-Based Polyurethane
Step 01
Take a bristled brush and it has to be gentle enough. You can choose a foam brush too. You will get permanent brush strokes if you use a cheap bristled brush to apply the poly. For flat surfaces, foam-based brushes are suitable, and they are affordable too. To get fine details, you can go with a bristle brush.
Step 02
The coat of finish should be sufficient and nearly thick, but not too thin. To brush out the bubbles, give long and straight strokes at the tabletop or wooden surface. If you find any remaining bubbles on the surface, don’t sweat your forehead overthinking, they will disappear within a short time.
Step 03
Once the first coat dried entirely, take the sandpaper and lightly sand the surface again. This time, you can choose 320 – grit sandpaper. The polyurethane will wipe out quickly if you give a harsh sanding. So, while sanding through the thin coating, be careful not to be harsh. Because the stain can be damaged like this. Before applying the second coat, remove all the dust using a tack towel.
Follow the same procedure until you get the required level of finishing. The 2-level coating is good enough to get the optimum level of protection. But if the kitchen table or furniture is on the floor and the risk of getting moisture from time to time is there, you can apply the 3-level coating. The finish will become smoother after every coat. For a steady sheen level, use steel wool to rub out the finish.
Tips on Applying Water-based Polyurethane
We all know that water and oil don’t mix well. It means water-based polyurethane will not incorporate correctly with oil-based stain. So, if you are applying the water-based polyurethane on the stain, the stained surface has to be slightly “rough up.” Synthetic steel wool will help you to make the surface “rough up.” It will block the polyurethane form edging on the wooden surface. Read Also: Staining Wood Dark – 7 Tips to Get Darker & Richer Finish.
How Many Coats of Water-Based Polyurethane Apply on Kitchen Table:

The standard application process is similar to the oil-based polyurethane.
Step 01
Take a foam brush or cloth to apply a thin coat. Don’t apply too much poly. Otherwise, you will get a lot of grains on the surface.
Step 02
Within a few hours, the first coating will dry, and then you can go for the second coating. If you follow the same procedure, you may not need to sand the surface, as you did during the oil-based polyurethane application process.
Now, how many coats of water-based polyurethane on the Kitchen table will you apply? For the lightly used project, give at least 3-level coatings. And you can’t avoid applying 4-level coatings if the furniture is on a floor to give the furniture ultimate protection.
Wipe-on and Spray Polyurethane

Characteristically, both wipe-on and spray polyurethane are thin. And undoubtedly, they will create a thin coat on a wooden surface. Applying spray poly is similar to spraying paint.
Both options are best for applying polyurethane on tricky applications like vertical surfaces. But they also have disadvantages. As they are thin, to get a protective layer, you will require more coating than oil-based or water-based polyurethane. Minimum of 5 – 6-level coatings is needed, using a regular brush instead of 2 -3 coats.
Read Also: How to Fix Wood Stain Mistakes: 9 DIY Solutions for Poor Stain Job.
Last Words
One coat of polyurethane is never enough to get a glowing finish; multiple coating is compulsory. In short, look at the below points for an overview of the above tips.
- Don’t forget to sand down the surface.
- No dust should present on the surface, make sure.
- After applying the first coat, wait until it gets dried.
- Respectively, apply the 2nd and 3rd coat, and after every coating process, give a break to let the coat dry.
- If there are any imperfections, use a razor to fix them.
- Use a rubbing compound like steel wool to rub out the finish.
That’s all, and I believe, after following the above instruction, you will have a pleasant and shiny kitchen table or furniture. And everyone can’t resist themselves to say “WOW!” after looking at your wooden home appliances. Best of luck for your DIY project!
Last Updated on July 11, 2020 by Rogers Weber
[As an Amazon Associate I earn from qualifying purchases.]


Can I’ll put an oil polyurethane on top of the table where I’ve already applied three coats of water-based polyurethane