Buffing Polyurethane Finish: 8 Steps to Apply Smooth Finish
Polyurethane finish is well known to people who are into making different types of furniture. The main reason for applying a polyurethane finish is to protect the wood from scratches, liquids, etc, which can be the cause of permanent damage. It adds a hard and protective layer to the surface. That’s why it is an important step that you should not skip.
Many of you don’t know the process of applying the polyurethane finish and end up ruining the ftableurniture. But, do not worry as we are here to let you know the whole process and everything related to buffing polyurethane finish. Stay with us.
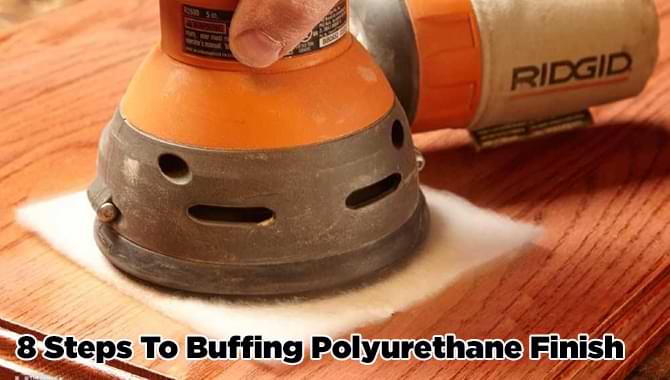
Table of Contents:=>
Why Use Polyurethane?
Polyurethane is basically plastic but in a form of liquid. It looks like plastic after it dries. You can find polyurethane in two forms. They are water-based polyurethane and oil-based polyurethane. Also, they come in different varieties such as satin, glossy, etc.
Water-based polyurethane is famous among people because of its’ low toxicity and low odor. It does not give you any color like an oil-based one and dries much faster. However, water-based polyurethane does not hold up well to chemicals and heat. That’s why it is perfect for things that are not exposed to extremes such as, desks, bookshelves, side tables, and photo frames.
On the other hand, oil-based polyurethane is a bit more durable than a water-based one. And also, it is durable when it comes to tolerating heat which is a big plus point. Oil-based polyurethane adds a little color tone and brings the richness out. But, the disadvantage of oil-based polyurethane is it takes more time to dry.
Read Also: How to Protect Wooden Dining Table with Polyurethane
Oil-Based Polyurethane or Water-Based Polyurethane:
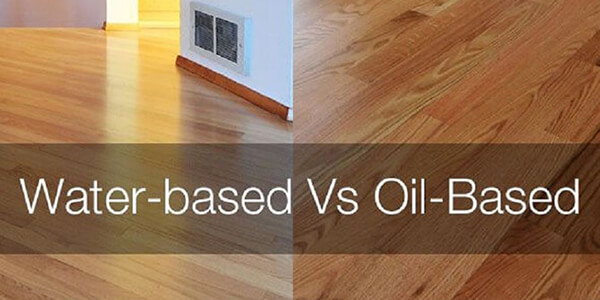
It is usual to get confused about which polyurethane is to use, oil-based polyurethane or water-based polyurethane. Well, the decision depends on your preference and project. If you want polyurethane that can be applied easily then oil-based polyurethane will be perfect for you. This kind of polyurethane is also less temperamental than a water-based one. The positive side of oil-based polyurethane is it just needs two or three coats as it is thicker and contains more solid unlike water-based polyurethane, which needs four or five coats. But, the problem of oil-based polyurethane is, it takes time to dry which can increase the danger of getting dust or bugs and also can slow down the project.
On the other hand, water-based polyurethane dries much faster than oil-based ones. But the downside of this polyurethane is, it could raise the grain, can be temperamental, and susceptible to watermarks.
We can see both polyurethane have some advantages and disadvantages. So, the decision is yours. Choose the one which fulfills most of your requirements.
8 Steps To Buffing Polyurethane Finish:
How to Apply a Smooth Polyurethane Finish:
To start the process, you will need some tools and materials. Here are they.
- Paint Roller => CheckOnAmazon
- Orbital Sander => CheckOnAmazon
- Plastic Sheeting => CheckOnAmazon
- Polyurethane => CheckOnAmazon
- Mineral Spirit => CheckOnAmazon
- Sandpaper => CheckOnAmazon
- Sanding pad => CheckOnAmazon
- Wipe-on polyurethane => CheckOnAmazon
- Wood Stain Applicator Pad => CheckOnAmazon
Step 1: Sand Out Pencil Lines:

First, draw some light pencil lines on the periphery at every grit stage and sand carefully. You will be ready to move on to the next grit once the pencil lines disappeared.
Step 2: Get a Clean Work Area:
The key to getting a perfect polyurethane finish is a “clean work area”. If you have a messy workplace then your finish will not be smooth as you wanted. Also, it will take a lot of effort to have a good result. Thus, it is important to maintain a clean work area. You will have to work less to get a flawless finish if you maintain a dust-free projects and surroundings. You can vacuum the project, floor, and workbench before starting the process for a clean work area.
Also, try to spread out some poly under the piece that is going to be finished. It will help you to save the floor from spills and drips. It will also make the cleanup easy for you. You can reuse the sheets a few times before throwing them out.
However, do not sand and finish the piece on the same day as the dust and dirt stay in the air for several hours.
Step 3: Use Mineral Spirits To Wipe The Project:

Now, take a tack cloth or lint-free cloth and wipe down the ongoing project carefully. Also, do not forget to saturate the cloth with solvent. You can use an old cotton t-shirt for this purpose. It will do the job perfectly. However, this step clears all the traces of dust in a few minutes. Keep in mind that, you cannot use water as it will raise the grain again, and therefore, you will have to sand again. https://en.wikipedia.org/wiki/White_spirit
Step 4: Use a Roller:

A 6-inch roller is perfect for applying the poly. It does the job fast and evenly. Also, it does not leave any puddles, brushstrokes, or thin spots. After doing the finish use a ranking light to see if the periphery is completely covered or not. If not roll again. However, there will be a lot of flaws if you watch the finish right after doing it. Do not get panicked.
Re-dip the roller after every coat in the mineral spirit. Then put the roller into a plastic bag for the nearer coat. Make sure that the bag is zippered. Also, leave the wet tray to dry at the same time. After a few hours, the dried poly will come out of the pan. You can put two coats on the interior and side of the cabinet and three coats on the tabletops for extra protection.
Step 5: Finish Both Sides at The Same Time:

When it comes to the solid wood top, try to finish both sides of the wood, the bottom, and the top periphery, at the same time. It does not matter if the bottom surface shows or not.
To lessen the drying time, first, coat the bottom carefully and then flip it over immediately and finish the top as well. Well, you might get some fingerprints on the bottom surface. But it does not matter as the final coat is not done yet. And when it comes to the final coat, you can skip the bottom surface as one single final coat is not a big deal for the underside.
Step 6: Use Wipe-on Poly:

Give some time to dry the roll-on coat and after drying, take some wipe-on poly. You can use the same sheen that you have used for roll-on poly. Then, use the wipe-on poly on the small and narrow areas, such as legs, face frames, doors, etc. It is wise to do this step once the large areas are completely dried. Otherwise, you might smudge the adjacent areas which will ruin the whole thing. However, to complete this step you only need a cotton rag and a pair of gloves.
Step 7: Sand Lightly:
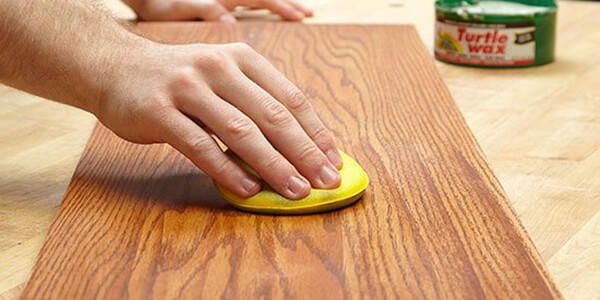
Now, it’s time to sand lightly with pads and papers. It is always a good idea to sand between the coat. You can use fine synthetic pads for sanding between the coats. It helps to roughen the periphery which is the main goal. Also, it rubs out hair, dust motes, and drips.
Step 8: Choose a Dust Free Area to Dry the Final Coat:
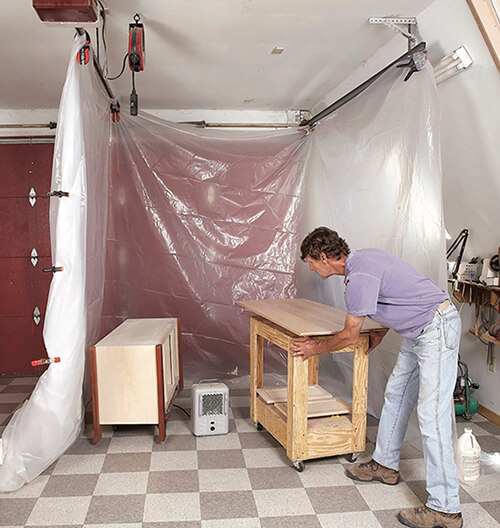
It is very important to choose an area that is dust-free before you let the final coat dry. To get a dust-free area, you can vacuum the working area again and let it settle for one night. Then, in the morning, you can let your work pieces dry without any tension.
Tips And Tricks For Working With Polyurethane:
- Do not ever shake the can of polyurethane. Because it will introduce you to uncountable numbers of bubbles that will be visible in the finish of your wood. So, instead of shaking just stir the can gently.
- Always do your finishing work in a clean place. Also, make sure that the place is well ventilated. Otherwise, dust will ruin your finished. That’s why never do the finishing work outside as there remains a lot of dust in the air.
- Once you have done applying the polyurethane do not go to the next step right away. Give the finish enough time to dry.
- It is always best to apply polyurethane over a flat surface. Otherwise, the polyurethane might drip off or run.
How to Get Rid of Polyurethane Bubbles:
Getting bubbles is one of the most common problems that people face while finishing any piece of wood. There are two main reasons that cause bubbles and brush marks as well. One of them is the brushing method or the way you apply the finish. Many of us think if we take time and brush out the finish nicely it will stay smooth and will not cause any bubbles or bumps, which is absolutely wrong. To be honest, this is the cause why you face bubbles in your finish. Brushing helps to introduce air into your finish which creates air bubbles. Even if you stay careful you cannot skip bubbles in this way.
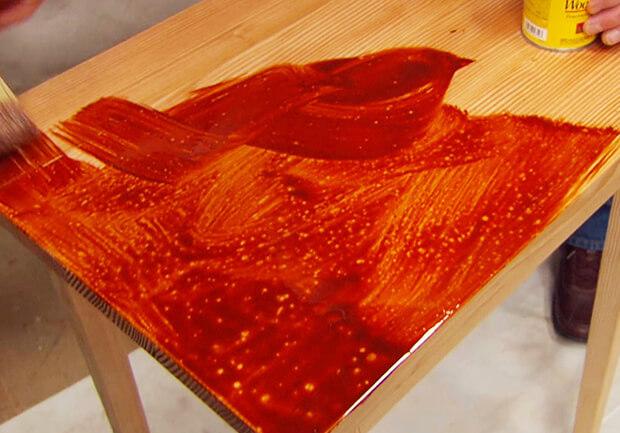
Secondly, if you do not give time and brush out the finish a bit more then the solvent in your finish will evaporate quickly and will set up soon too which will cause bubbles. Because it will not give the bubbles enough time to pop. Also, it will not get time to level by itself. Also, if the wood is not sanded sufficiently then it will cause bubbles.
By now, we know that a proper way of brushing will help you to reduce the air bubbles in the finish. To get a bubble-free finish first, apply a thin layer of finish and then build the finish thoroughly. Also, give time between each finish so the bubbles can pop.
But what if you already have some bubbles in your finish? Well, don’t panic, we have a solution for this as well. Just follow these steps.
- Take 120 grit or finer sandpaper and scuff-sand the bubbles. It depends on the things that you are finishing.
- Wipe away the dirt and dust with a damp cloth.
- Lastly, apply a new and fresh coat of finish. Do not forget to apply the applicator slowly otherwise you will get more bumps.
Sanding Polyurethane Between Coats:

It is always a good idea to cover your wood with more than one coat of polyurethane. However, several coats always require sanding between them. Before going to the process of sanding in-between coats, let’s get an idea about the first one. The first coat of polyurethane should be thin so that, you can sand it sooner as it dries faster. But do not sand before 24 hours. After that take a fine-grit abrasive and sand the dried coat of polyurethane. Don’t forget to clean the dust with a damp cloth.
Now, you are ready for in-between coats and therefore, sanding between them. First, apply two or more additional coats of polyurethane, and do not forget to sand between each of them. Always try to brush with the grain while applying polyurethane. Also, apply a thin layer of coat each time. After applying the coat of polyurethane always wait at least 24-48 hours so that, the finish dries properly and becomes harder.
Do not sand the piece of wood after applying the last coat of polyurethane. Give it time so that, it can be harder. After that, apply some paste wax or any other furniture wax product.
Now you know the whole process of buffing polyurethane finish. So, do not worry and start doing it on your own as soon as possible. If you have any more questions then feel free to ask in the comment section.
Last Updated on October 17, 2021 by Rogers Weber
[As an Amazon Associate I earn from qualifying purchases.]


Can anyone in a position to recommend good Industrial Painting Sales Leads? Thank you 😀
are there calories in vape liquid