How to Attach Trim without Nails or a Nail Gun
Trim installation is a part of interior decoration. Its purpose is to case the door, window, baseboards, and so on. For attaching the trim, nailing is one of the best solutions. Nail guns come with a strong configuration to shoot nails in an accurate place and help pack up your job as soon as possible. Therefore, many trust nail guns for attaching trim.
But what if there is no nail gun available and you still need to attach the trim to be done with your project? You might ask yourself how to attach trim without nails or a nail gun at that point. Well, many people adopt other ways to attach trim as nailing is not always satisfying. It leaves terrible gauges and sometimes messes up with the project when it stops working because of mechanical issues.

Therefore, adopting alternative ways can make your trim installation job easier and hassle-free.
Table of Contents:=>
3 Ways to Attach Trim without a Nail Gun or Nails:
There are some other ways to attach trim without nails. A nail gun might be an effective way to attach the trim to a wall or door, but things need to be adopted if there is no nail gun or nails around you. Attaching trim following other ways will provide you the same result that would be got by using a pneumatic nail gun. Therefore, if you want an effective result in attaching trim without nails, adopt the following ways.
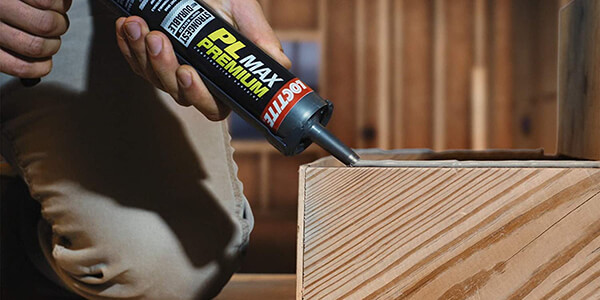
1. Construction Grade Adhesive – PL Premium:

A good adhesive can stand a lot if you wish it to do so. As adhesives come in different ranges, you need to find the range for your work. A strong adhesive knows how to fulfill the lack of a nail gun when you are offering it the job of attaching trim. And speaking of a construction-grade adhesive, we are highly impressed by PL Premium.
The polyurethane construction adhesive offers heavy-duty adhesion to the bond of PL Premium substance. It almost provides a great adhesion like a nail gun provides with its pneumatic energy. The weather-proof component of the adhesive even lets you attach trim outside as well. Besides, PL Premium requires very little and easy to apply. Also, it offers three times stronger bonding to the places where a strong attachment of trim is needed.
2. Liquid Nails:

Liquid nails is another adhesive that carries amazing adhesion components. The heavy-duty formula of the substance makes it trustable for doing the attachment job of trim. This substance is also known for its construction and latex-based adhesions.
For a long-lasting and solid attachment of the trim, you can use liquid nails. Besides, this substance is resistant to water. If you want to do the crown molding job, besides attaching the trim job, use liquid nails without any fear.
3. Silicone Caulk:

Silicone caulk is another best option that can be used as an alternative to nail guns or nails. Though it’s not entirely an adhesive, the silicone caulk carries adhesive components. Therefore, it works tremendously like a strong adhesive. Like glue, this chemical sticks to the attachment durably.
This substance greatly works on any kind of material. From metal to wood, silicone caulk offers excellent glue-like adhesion to the attachment. Also, it can be cleaned with water. For rescuing your trim from moisture, silicone caulk offers great service. Though the construction-grade adhesive is stronger, you should choose silicone caulk for the places where you need to detach the trim later.
Attaching Baseboards Without Nails or Nail Gun:
You can attach baseboards without the help of a nail gun accurately. A baseboard increases the beauty of the corner of room decoration or mostly interior decorations. But they look gorgeous in exterior designs as well. To set the baseboards properly without any fasteners, follow the next steps at once.
Step 1: Select Adhesive or Caulk:
You will need to get materials to do the baseboard attachment without nails. For this, the primal product you need is an adhesive like PL premium or silicone caulk. If you want your baseboard to detach after some day or year, then adopt silicone caulk.

Because this caulk will never fall off by itself and will stick to the attachment as long as you want. But if you want a strong adhesion and do not want it to break down in any situation then go for the PL premium adhesion.
Step 2: Gather Other Materials:
Though the substances are enough materials to do the baseboard attachment job, it will require some other materials, in case you need perfection. And the materials are,
- Instant Setting Glue => CheckOnAmazon=>
- Sandpaper
- A piece of cardboard
Step 3: Spray The Setting Glue:
First thing first, you need to spray the setting glue to get the right amount of adhesion. Take the help of a piece of cardboard in case you don’t want the setting glue to spread all over your wall and other places. Place the cardboard in the wall as a shield and spray the instant setting glue to the determined space – the bottom corner of your room for instance.
Take the basement and spray the setting glue to the upper flat portion of it. It will be enough tacky for both wall and baseboard to stick to each other.
Step 4: Apply the Adhesive or Caulk:
Later on, you should apply the adhesive or caulk in the middle portion of the baseboard. Apply it in a zigzag way so it covers all the places of the baseboard in order to get attached to the wall or other materials.
Step 5: Place the Baseboard:
After spraying the setting glue and adhesive or caulk, place the baseboard to the determined place perfectly. By the time you apply the caulk or adhesive on the baseboard, the setting glue will be tacky enough to support each other without the help of other supports like putting a rod or stick to prevent the basement from falling off. Then dab the baseboard on the place with the palm of your hand and take it some time to dry out.
Step 6: Sand the Excess Adhesive or Caulk:

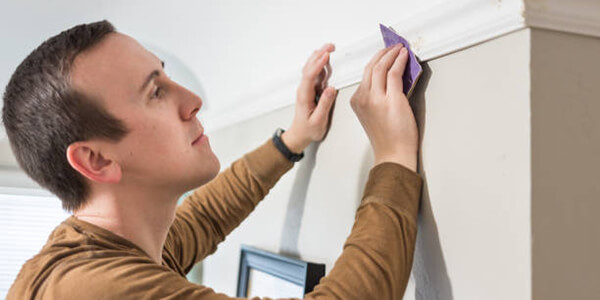
When you dab the baseboard, some adhesive or caulk may come out gliding. To make a seamless finish, you can use sandpaper. Just rub the sandpaper in a back-and-forth motion lightly until you get the edges of the basement even and smooth. After that, your basement attachment will all be ready to set without pushing a single nail or pursuing the help of a nail gun.
How to Install Door Trim without Nail Gun:
If you have no nail gun and yet you have nails then there’s a lot you can do with it. Also, if you’re out of nails and any kind of fasteners, you can make it as well. In this case, if you use adhesive or caulk, then you can adopt the same criteria that we have discussed before for basement attachment. But right now we’ll acknowledge you about the procedure of how to install door trim without a nail gun step by step.
Step 1: Preparations:
It’s important when you are up to accomplish a job you do some primal preparations to get an effective outcome. Therefore, gather the following materials at first,
- Safety goggles and boots
- A measurement tape
- Nails and screws
- A drilling machine
- Hammer
- Wood glue => Check on Amazon=>
- 40/80 teeth blade
Step 2: Measure and Precise the Trim:
The next thing you need to do is to measure the trim. After getting a perfect size you can cut the trim precisely. And only by a 40/80 teeth blade, you can cut the trim precisely. Make sure you are cutting it at a 45 angle. This angle allows the trim to fit perfectly with the jamb of the door.
Remember, if you want to stain the trim, stain it before cutting it with the teeth blade. Let it dry and then do the measurement and cutting jobs.
Step 3: Apply The Glue:
After that, you need to glue the end of the trim with another end of a trim. By gluing the end, you’ll get the shape of your door. A perfect measurement offers extreme success. Therefore, if you want less trouble, you have to measure the trim and shape it patiently. Because, these are sensitive works and if done carefully, 70 % of your job is done.
Step 4: Place The Trim:
This is the second-last part of your job. And to finish the job, you need to place the trim around the jamb. Then drill a hole at the corner of the top of it. You must wear goggles for your safety while you drill the trim. Otherwise, the dust and debris will go right into your eyes and thus can affect your eyes badly. After drilling, put a screw in it properly.
Step 5: Nail The Trim:
In this last step, all you need to do is to hammer the nail in the accurate place where you drilled already. Make sure you hold the accurate finish nail on the hole and not beside the hole. Take a hammer and start hammering the nail to make it sink. Hammer the nail tenderly until you are sure that the nail has sunk perfectly into the hole.
Don’t try to hammer the nail powerfully because it will only be a waste of your energy. But more importantly, huge pressure can break down the solidity of the trim and make it fragile. Therefore, a tender motion is required for this job. Remember to wear boots for safety.
Because when a nail fails to sink, it falls off right to the ground. And without consciousness, you might get your palm of the leg hurt terrifically. Therefore, it is always better to ensure your safety while doing this kind of DIY project.
FAQs:
Question: Can I Use Liquid Nails For Trim?
Answer: It’s a big yes. As we’ve said before, adhesive makes the trim attach to any kinds of substances when there is no option for using a nail gun or nails. And liquid nails are firmly adhesive. Also, you can get different ranged adhesions in liquid nails. To do the firm job of attaching trim without nails or a nail gun, take up the heavy-duty liquid nails, and get a tremendous result.
Last Updated on July 16, 2024 by Rogers Weber
[As an Amazon Associate I earn from qualifying purchases.]


